Getting Started with InfoSphere Data Architect

Create successful ePaper yourself
Turn your PDF publications into a flip-book with our unique Google optimized e-Paper software.
134 <strong>Getting</strong> started <strong>with</strong> <strong>InfoSphere</strong> <strong>Data</strong> <strong>Architect</strong><br />
e. Select the Create from reverse engineering radio button, then click Next.<br />
3. On the Source page, make sure the <strong>Data</strong>base radio button is selected, then click Next.<br />
4. On the Select Connection page, select the SAMPLE database connection profile, then click Next.<br />
5. On the Select Objects page, select the STUDENT_LIFE schema, then click Next.<br />
6. On the <strong>Data</strong>base Elements page, keep the default selections, then click Next.<br />
7. On the Options page, click Finish.<br />
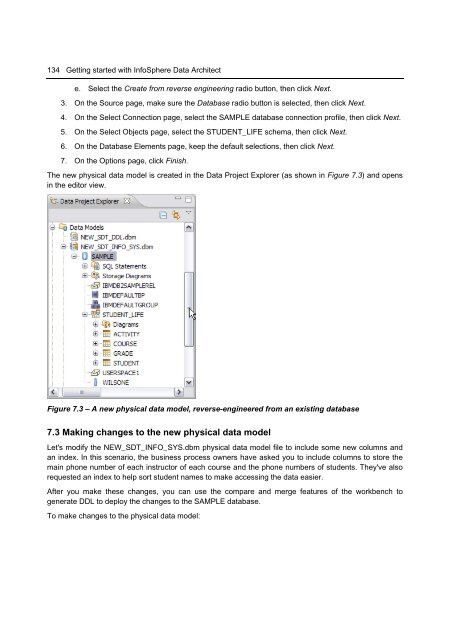
The new physical data model is created in the <strong>Data</strong> Project Explorer (as shown in Figure 7.3) and opens<br />
in the editor view.<br />
Figure 7.3 – A new physical data model, reverse-engineered from an existing database<br />
7.3 Making changes to the new physical data model<br />
Let's modify the NEW_SDT_INFO_SYS.dbm physical data model file to include some new columns and<br />
an index. In this scenario, the business process owners have asked you to include columns to store the<br />
main phone number of each instructor of each course and the phone numbers of students. They've also<br />
requested an index to help sort student names to make accessing the data easier.<br />
After you make these changes, you can use the compare and merge features of the workbench to<br />
generate DDL to deploy the changes to the SAMPLE database.<br />
To make changes to the physical data model: