Getting Started with InfoSphere Data Architect

You also want an ePaper? Increase the reach of your titles
YUMPU automatically turns print PDFs into web optimized ePapers that Google loves.
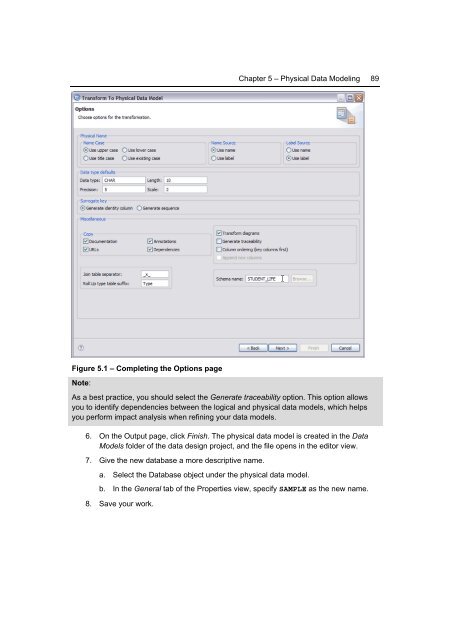
Chapter 5 – Physical <strong>Data</strong> Modeling 89<br />
Figure 5.1 – Completing the Options page<br />
Note:<br />
As a best practice, you should select the Generate traceability option. This option allows<br />
you to identify dependencies between the logical and physical data models, which helps<br />
you perform impact analysis when refining your data models.<br />
6. On the Output page, click Finish. The physical data model is created in the <strong>Data</strong><br />
Models folder of the data design project, and the file opens in the editor view.<br />
7. Give the new database a more descriptive name.<br />
a. Select the <strong>Data</strong>base object under the physical data model.<br />
b. In the General tab of the Properties view, specify SAMPLE as the new name.<br />
8. Save your work.