display

Create successful ePaper yourself
Turn your PDF publications into a flip-book with our unique Google optimized e-Paper software.
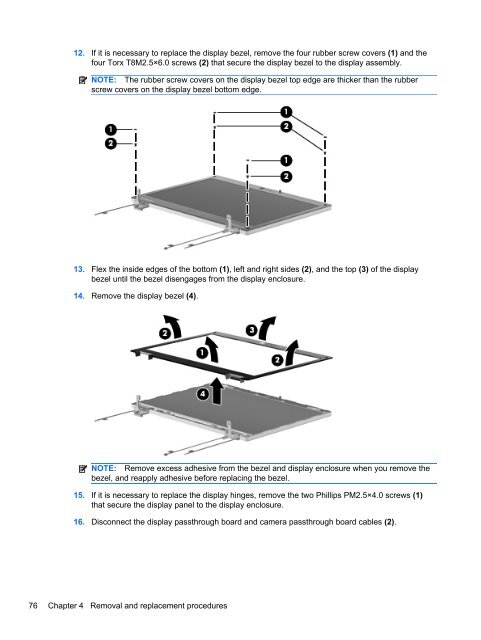
12. If it is necessary to replace the <strong>display</strong> bezel, remove the four rubber screw covers (1) and the<br />
four Torx T8M2.5×6.0 screws (2) that secure the <strong>display</strong> bezel to the <strong>display</strong> assembly.<br />
NOTE: The rubber screw covers on the <strong>display</strong> bezel top edge are thicker than the rubber<br />
screw covers on the <strong>display</strong> bezel bottom edge.<br />
13. Flex the inside edges of the bottom (1), left and right sides (2), and the top (3) of the <strong>display</strong><br />
bezel until the bezel disengages from the <strong>display</strong> enclosure.<br />
14. Remove the <strong>display</strong> bezel (4).<br />
NOTE: Remove excess adhesive from the bezel and <strong>display</strong> enclosure when you remove the<br />
bezel, and reapply adhesive before replacing the bezel.<br />
15. If it is necessary to replace the <strong>display</strong> hinges, remove the two Phillips PM2.5×4.0 screws (1)<br />
that secure the <strong>display</strong> panel to the <strong>display</strong> enclosure.<br />
16. Disconnect the <strong>display</strong> passthrough board and camera passthrough board cables (2).<br />
76 Chapter 4 Removal and replacement procedures