Embroidery Basics Articles

Create successful ePaper yourself
Turn your PDF publications into a flip-book with our unique Google optimized e-Paper software.
Stitchitize <strong>Embroidery</strong> Design Learning Studio<br />
LESSON 1 - Digitizing <strong>Basics</strong> & Theory<br />
Lesson one covers the basics of digitizing artwork for embroidery. We have broken down the art of digitizing into some basic<br />
fundamental elements. Each element is important to understand, as they are the tools you will have as control factors over<br />
how your designs sew out. We will refer to these principles throughout the lessons and will expand upon them as we do. At<br />
the top of each lesson there are links to the various topics in that lesson, so that you can easily return to review a topic. Try<br />
the glossary for any terms that we may use that you are not familiar with. If you have questions about any of the topics please<br />
use the bulletin board in the student lounge to post them. Perhaps the answer you are looking for is already there from a previous<br />
student. This way we can all learn together and from each other.<br />
Stitch Types<br />
The goal of the Stitchitize embroidery Design School is to break down modern computerized embroidery, or Swiss <strong>Embroidery</strong>,<br />
into the most basic elements. The embroidery machine understands movement from one stitch to the next and has<br />
settings for either needle up (jump) or needle down (stitch). The needle remains stationary in Swiss embroidery and the movement<br />
comes only from the hoop. The modern stitch types we use in creating embroidery designs are formed by moving the<br />
hoop in a similar pattern for a series of stitches that produce an effect or "stitch-type". There are three main types of stitches<br />
to choose from with many variations of each. The three basic types are "Satin stitch", "Fill stitch" and "Run stitch". Many different<br />
names are used for each stitch type. For example, Satin stitch can be called a "Blat", Fill stitch can be referred to as<br />
"Tatami" and Run stitch is also known as "Detail" or "Underlay". For your convenience, a glossary has been created with commonly<br />
used embroidery terms and explanations. We hope to make our glossary one of the most extensive tools available and<br />
welcome any input from our students.<br />
Basic Stitch Types<br />
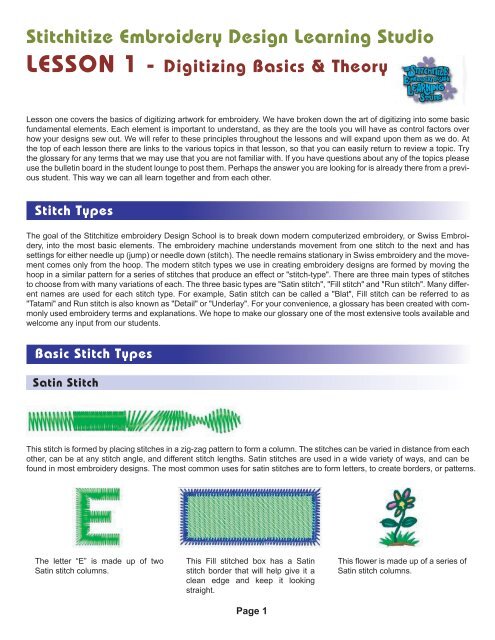
Satin Stitch<br />
This stitch is formed by placing stitches in a zig-zag pattern to form a column. The stitches can be varied in distance from each<br />
other, can be at any stitch angle, and different stitch lengths. Satin stitches are used in a wide variety of ways, and can be<br />
found in most embroidery designs. The most common uses for satin stitches are to form letters, to create borders, or patterns.<br />
The letter “E” is made up of two<br />
Satin stitch columns.<br />
This Fill stitched box has a Satin<br />
stitch border that will help give it a<br />
clean edge and keep it looking<br />
straight.<br />
Page 1<br />
This flower is made up of a series of<br />
Satin stitch columns.