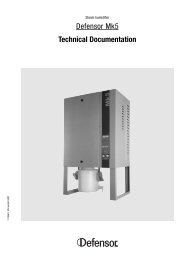
Defensor ABS2 Installation and Operating Instructions
Defensor ABS2 Installation and Operating Instructions
Defensor ABS2 Installation and Operating Instructions

Create successful ePaper yourself
Turn your PDF publications into a flip-book with our unique Google optimized e-Paper software.
16<br />
The control PCB holding the screw terminals <strong>and</strong> the DIP switches for<br />
configuration is located under the cover (fixed with 4 screws), on the left<br />
side of the base unit.<br />
Lead all connection cables through the cable gl<strong>and</strong>s (strain relief) to<br />
the control PCB. Important! Thoroughly tighten the cable gl<strong>and</strong>s to prevent<br />
humidity from entering the controller housing.<br />
Power supply<br />
Establish the power supply according to the wiring diagram while observing<br />
the following information:<br />
– The 2-pole service switch Q (located close to the base unit) <strong>and</strong> the<br />
fuse F (max. 10 A, slow-blow) are m<strong>and</strong>atory.<br />
– Minimum cable section: 3 x 1.5 mm2 – Caution! The appliances must be connected only to a mains with a<br />
protective earth. Do not override the protective effect by using an<br />
extension cable without an earth conductor.<br />
Any discontinuity in the earth conductor inside or outside the appliance<br />
or undoing the earth-conductor connection can render the appliance<br />
dangerous. The deliberate disconnection of the earth conductor is<br />
prohibited!<br />
– Caution! Make sure the selected supply voltage (see setting of switch<br />
“SW3” on control PCB) matches the local mains voltage. If this is not the<br />
case adjust switch “SW3” accordingly.<br />
Connection of an external humidistat<br />
Connect the external humidistat to screw terminal X2 (internal power<br />
supply) according to the wiring diagram.<br />
Danger! Mains voltage (up to 230V) is applied to connector L1 of screw<br />
terminal X2. Therefore, disconnect the unit from the mains (maintenance<br />
switch to off) before carrying out installation work.<br />
Note: Particular applications may require the humidistat to be powered<br />
externally. In this case ask your <strong>Defensor</strong> dealer for the special wiring<br />
diagram.<br />
Connection of an external error indicator<br />
Connect the external error indicator (24 VDC) to connectors 1 <strong>and</strong> 2 of<br />
screw terminal X15 according to the wiring diagram. The maximum<br />
admissible current is 50 mA.<br />
Supplying power to the fan of the humidistat <strong>Defensor</strong> H5-V<br />
The power supply to the fan of the humidistat <strong>Defensor</strong> H5-V is made<br />
via connectors 3 <strong>and</strong> 4 of screw terminal X15 (see wiring diagram).<br />
To conclude setup work connect the grounding wire to the cover, then fix<br />
the cover with the 4 Phillips screws.