Table of Contents - Ibanez Guitars
Table of Contents - Ibanez Guitars
Table of Contents - Ibanez Guitars

You also want an ePaper? Increase the reach of your titles
YUMPU automatically turns print PDFs into web optimized ePapers that Google loves.
32<br />
Adjustment Manual<br />
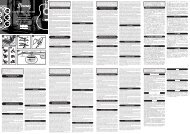
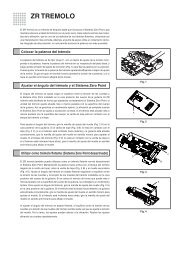
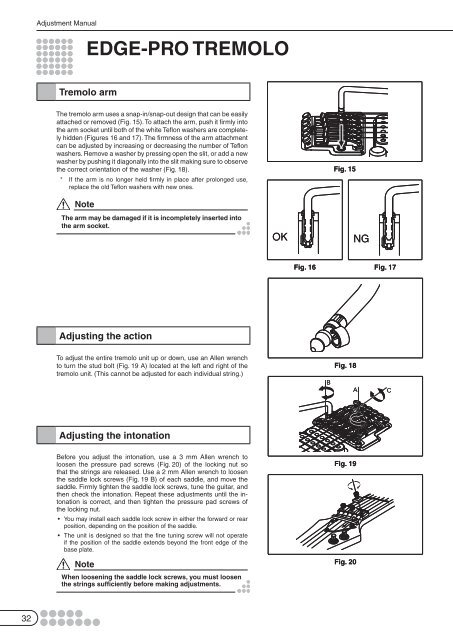
EDGE-PRO TREMOLO<br />
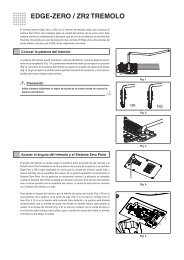
Tremolo arm<br />
The tremolo arm uses a snap-in/snap-out design that can be easily<br />
attached or removed (Fig. 15). To attach the arm, push it firmly into<br />
the arm socket until both <strong>of</strong> the white Teflon washers are completely<br />
hidden (Figures 16 and 17). The firmness <strong>of</strong> the arm attachment<br />
can be adjusted by increasing or decreasing the number <strong>of</strong> Teflon<br />
washers. Remove a washer by pressing open the slit, or add a new<br />
washer by pushing it diagonally into the slit making sure to observe<br />
the correct orientation <strong>of</strong> the washer (Fig. 18).<br />
* If the arm is no longer held firmly in place after prolonged use,<br />
replace the old Teflon washers with new ones.<br />
Note<br />
The arm may be damaged if it is incompletely inserted into<br />
the arm socket.<br />
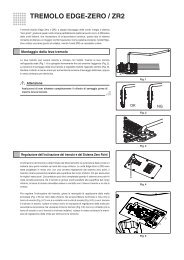
Adjusting the action<br />
To adjust the entire tremolo unit up or down, use an Allen wrench<br />
to turn the stud bolt (Fig. 19 A) located at the left and right <strong>of</strong> the<br />
tremolo unit. (This cannot be adjusted for each individual string.)<br />
Adjusting the intonation<br />
Before you adjust the intonation, use a 3 mm Allen wrench to<br />
loosen the pressure pad screws (Fig. 20) <strong>of</strong> the locking nut so<br />
that the strings are released. Use a 2 mm Allen wrench to loosen<br />
the saddle lock screws (Fig. 19 B) <strong>of</strong> each saddle, and move the<br />
saddle. Firmly tighten the saddle lock screws, tune the guitar, and<br />
then check the intonation. Repeat these adjustments until the intonation<br />
is correct, and then tighten the pressure pad screws <strong>of</strong><br />
the locking nut.<br />
• You may install each saddle lock screw in either the forward or rear<br />
position, depending on the position <strong>of</strong> the saddle.<br />
• The unit is designed so that the fine tuning screw will not operate<br />
if the position <strong>of</strong> the saddle extends beyond the front edge <strong>of</strong> the<br />
base plate.<br />
Note<br />
When loosening the saddle lock screws, you must loosen<br />
the strings sufficiently before making adjustments.<br />
Fig. 15<br />
OK NG<br />
Fig. 16<br />
Fig. 18<br />
Fig. 19<br />
Fig. 20<br />
Fig. 17