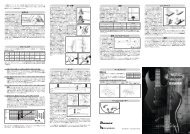
Table of Contents - Ibanez Guitars
Table of Contents - Ibanez Guitars
Table of Contents - Ibanez Guitars

You also want an ePaper? Increase the reach of your titles
YUMPU automatically turns print PDFs into web optimized ePapers that Google loves.
40<br />
Adjustment Manual<br />
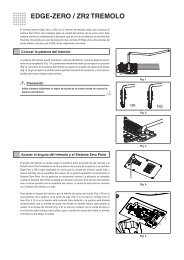
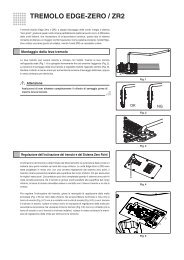
String replacement<br />
Install new strings by passing them through the tremolo block from<br />
the back side <strong>of</strong> the guitar (Fig. 49 D).<br />
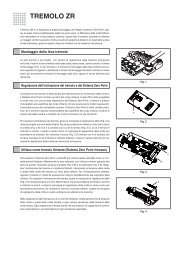
Tremolo installation angle adjustment<br />
The synchroniZR tremolo is normally used in a condition called<br />
floating where the arm can be adjusted in both directions <strong>of</strong> arm<br />
down and up. Setting the tremolo so that it is approximately parallel<br />
to the surface <strong>of</strong> the guitar body enables it to display its most<br />
outstanding performance (Fig. 50).<br />
The tremolo installation angle is adjusted by balancing the string<br />
tension and the tension <strong>of</strong> the tremolo spring installed on the back<br />
side <strong>of</strong> the guitar body. Adjust the tremolo installation angle with the<br />
spring adjustment knob (Fig. 49 E) with the unit correctly tuned.<br />
If the tremolo is leaning too much toward the front with regard to<br />
the neck, turn the spring adjustment knob clockwise. Conversely, if<br />
the tremolo is leaning too much toward the back with regard to the<br />
neck, turn the spring adjustment knob counterclockwise.<br />
Caution<br />
For adjustment <strong>of</strong> the tremolo installation angle in a floating<br />
state, the tuning will fluctuate irregularly when the<br />
spring adjustment knob is adjusted, so adjust it patiently<br />
while repeating tuning.<br />
Arm up and stopper function<br />
The synchroniZR tremolo has an arm up and stopper function. This<br />
function is for using the hard to tune floating tremolo like a fixed<br />
bridge.<br />
First confirm that the bridge installation angle is correct (it does<br />
not matter if the tuning is not correct). If it is not correct, adjust it by<br />
turning the spring adjustment knob (Fig. 49 E).<br />
Next, remove the back panel. Turn the arm up and stopper knob<br />
(Fig. 51 F) and stop it when the tip <strong>of</strong> the arm up and stopper<br />
(Fig. 51 G) touches the tremolo block (Fig. 51 H). Confirm that the<br />
bridge installation angle is correct and turn the spring adjustment<br />
knob a few more times clockwise.<br />
Perform tuning in this condition. If the tuning is not stable, confirm<br />
that the tip <strong>of</strong> the arm up and stopper (Fig. 51 G) is touching the<br />
tremolo block (Fig. 51 H). If it is not, turn the spring adjustment<br />
knob a little more clockwise.<br />
F<br />
G<br />
E<br />
Fig. 49<br />
Fig. 50<br />
D<br />
Fig. 51<br />
PARALLEL<br />
H