

Continental L-Head Overhaul Manual - Igor Chudov
Continental L-Head Overhaul Manual - Igor Chudov
Continental L-Head Overhaul Manual - Igor Chudov

You also want an ePaper? Increase the reach of your titles
YUMPU automatically turns print PDFs into web optimized ePapers that Google loves.
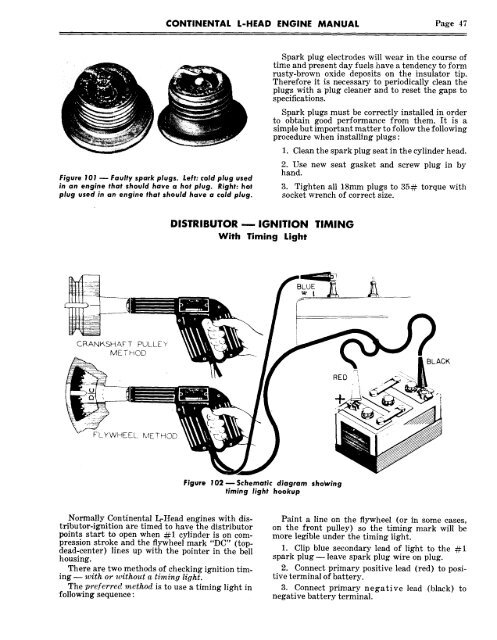
Figure 101 ~ Faulty spark plugs. Left: cold plug used<br />
in an engine that should have a hot plug. Right: hot<br />
plug used in ar~ engine that should have a cold plug.<br />
C_.RANK, SHAFT PULLEY<br />
METHOD<br />
FLYWHEEL k~lE THOD<br />
Normally <strong>Continental</strong> L-<strong>Head</strong> engines with distributor-ignition<br />
are timed to have the distributor<br />
points start to open when ¢~1 cylinder is on compression<br />
stroke and the flywheel mark "DC" (topdead-center)<br />
lines up with the pointer in the bell<br />
housing.<br />
There are two methods of checking ignition timing<br />
-- with or without a timing light.<br />
The preferred method is to use a timing light in<br />
following sequence:<br />
CONTINENTAL L-HEAD ENGINE MANUAL Page 47<br />
DISTRIBUTOR -- IGNITION TIMING<br />
With Timing Light<br />
Spark plug electrodes will wear in the course of<br />
time and present day fuels have a tendency to form<br />
rusty-brown oxide deposits on the insulator tip.<br />
Therefore it is necessary to periodically clean the<br />
plugs with & plug cleaner and to reset the gaps to<br />
specifications.<br />
Sp&rk plugs must be correctly installed in order<br />
to obtain good performance from them. It is a<br />
simple but important matter to follow the following<br />
procedure when installing plugs:<br />
1. Clean the spark plug seat in the cylinder head.<br />
2. Use new seat gasket and screw plug in by<br />
hand.<br />
3. Tighten all 18mm plugs to 35¢~ torque with<br />
socket wrench of correct size.<br />
BLUE<br />
~ I<br />
RED<br />
Figure 102-- Schematic diagram sho~ving<br />
timing light hookup<br />
Paint a line on the flywheel (or in some cases,<br />
on the front pulley) so the timing mark will be<br />
more legible under the timing light.<br />
1. Clip blue secondary lead of light to the<br />
spark plug -- leave spark plug wire on plug.<br />
2. Connect primary positive lead (red) to positive<br />
terminal of battery.<br />
3. Connect primary negative lead (black)<br />
negative battery terminal.


