Amiko Alien 2 User Manual - Freeviewshop.co.nz
Amiko Alien 2 User Manual - Freeviewshop.co.nz
Amiko Alien 2 User Manual - Freeviewshop.co.nz

You also want an ePaper? Increase the reach of your titles
YUMPU automatically turns print PDFs into web optimized ePapers that Google loves.
Networking<br />
on full screen. The supported language can be<br />
changed without any notice.<br />
6. Teletext Language: Press [ok] button, then press<br />
[▲, ▼] buttons to select on option, at last press<br />
[ok] button. Or [◄, ►] buttons select the TXT<br />
language. As long as the services support it, the<br />
Teletext language is changeable by teletext menu<br />
on full screen. The supported language can be<br />
changed without any notice.<br />
7. Subtitle display: Press [ok] button, then press [▲,<br />
▼] button to select on option, at last press [ok]<br />
button. Or [◄, ►] buttons select Auto or <strong>Manual</strong>.<br />
Auto: it will automatically display subtitle in has<br />
subtitle stream,<br />
<strong>Manual</strong>: It need press [yellow] key and select<br />
subtitle to display.<br />
8. Online Language: Press [ok] button, then press<br />
[▲, ▼] buttons to select on option, at last press<br />
[ok] button. Or [◄, ►] buttons select online menu<br />
language.<br />
Note: the Weather Forecast, FAQ, <strong>User</strong> <strong>Manual</strong><br />
language will change with the option.<br />
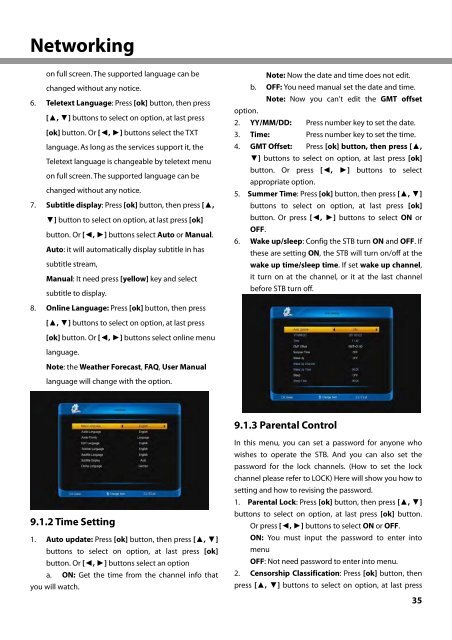
9.1.2 Time Setting<br />
1. Auto update: Press [ok] button, then press [▲, ▼]<br />
buttons to select on option, at last press [ok]<br />
button. Or [◄, ►] buttons select an option<br />
a. ON: Get the time from the channel info that<br />
you will watch.<br />
option.<br />
Note: Now the date and time does not edit.<br />
b. OFF: You need manual set the date and time.<br />
Note: Now you can't edit the GMT offset<br />
2. YY/MM/DD: Press number key to set the date.<br />
3. Time: Press number key to set the time.<br />
4. GMT Offset: Press [ok] button, then press [▲,<br />
▼] buttons to select on option, at last press [ok]<br />
button. Or press [◄, ►] buttons to select<br />
appropriate option.<br />
5. Summer Time: Press [ok] button, then press [▲, ▼]<br />
buttons to select on option, at last press [ok]<br />
button. Or press [◄, ►] buttons to select ON or<br />
OFF.<br />
6. Wake up/sleep: Config the STB turn ON and OFF. If<br />
these are setting ON, the STB will turn on/off at the<br />
wake up time/sleep time. If set wake up channel,<br />
it turn on at the channel, or it at the last channel<br />
before STB turn off.<br />
9.1.3 Parental Control<br />
In this menu, you can set a password for anyone who<br />
wishes to operate the STB. And you can also set the<br />
password for the lock channels. (How to set the lock<br />
channel please refer to LOCK) Here will show you how to<br />
setting and how to revising the password.<br />
1. Parental Lock: Press [ok] button, then press [▲, ▼]<br />
buttons to select on option, at last press [ok] button.<br />
Or press [◄, ►] buttons to select ON or OFF.<br />
ON: You must input the password to enter into<br />
menu<br />
OFF: Not need password to enter into menu.<br />
2. Censorship Classification: Press [ok] button, then<br />
press [▲, ▼] buttons to select on option, at last press<br />
35