Amiko Alien 2 User Manual - Freeviewshop.co.nz
Amiko Alien 2 User Manual - Freeviewshop.co.nz
Amiko Alien 2 User Manual - Freeviewshop.co.nz

You also want an ePaper? Increase the reach of your titles
YUMPU automatically turns print PDFs into web optimized ePapers that Google loves.
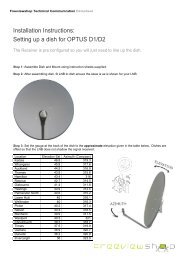
Networking<br />
[ok] button. Or press [◄, ►] buttons to select an<br />
option.<br />
View all: Play channels not need password.<br />
7, 12, 15, 18: those option determining that<br />
different stream, whether have to input password.<br />
Lock all: Play channels need input password.<br />
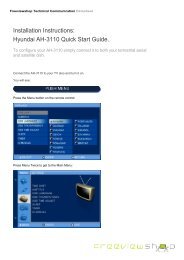
3. Time Control: Press [ok] button, then press [▲, ▼]<br />
buttons to select on option, at last press [ok] button.<br />
Or press [◄, ►] buttons to select ON or OFF<br />
On: Play channels not need password only in Allow<br />
time.<br />
OFF: Play channels not need password at any time.<br />
4. Allow time: Setting the start and end time to play<br />
channels that not need password.<br />
Note: This option you can’t edit when Time Control<br />
is “OFF”<br />
5. Change password and Confirm password: using<br />
to change password.<br />
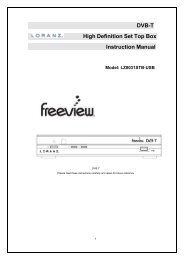
9.1.4 A/V Output<br />
In this menu, you can set TV_Scart, Screen ratio,<br />
Conversion, TV Standard, SPDIF, Dolby Digital HDMI.<br />
1. TV_Scart: Press [◄, ►] buttons to switch video<br />
output by RGB or CVBS with SCART cable.<br />
RGB:<br />
CVBS:<br />
2. Screen ratio: Press [◄, ►] buttons to switch video<br />
resolution circularly by the sequence “4:3<br />
16:9 Auto”. Or press [ok] button, and select it<br />
with [▲, ▼] buttons, then press [ok] button to<br />
<strong>co</strong>nfirm.<br />
4:3: Auto - Letterbox - Centre<br />
16:9: Auto - Pillar Box - Zoom<br />
Auto: The display format follow the channel<br />
details<br />
3. Conversion: Press [◄, ►] buttons to switch the<br />
manner circularly by the sequence<br />
“LETTER_BOX PAN_SCAN COMBINED<br />
IGNORE”. Or press [ok] button, and select it with<br />
[▲, ▼] buttons, then press [ok] button to <strong>co</strong>nfirm.<br />
4. TV Standard: Press [ok] button, then press [▲, ▼]<br />
buttons to select on option, at last press [ok]<br />
button. Or press [◄,►] buttons to select an option.<br />
480 576 720 1080i1080p Auto<br />
Note:<br />
a. Auto means system will set the video output<br />
resolution ac<strong>co</strong>rding to the program it’s<br />
playing, different resolution programs<br />
switching perhaps will makes TV screen<br />
flickering.<br />
b. When you <strong>co</strong>nnect with A/V or SCART, the TV<br />
has output that only you change to resolution<br />
the TV supports.<br />
5. SPDIF: Press [ok] button, then press [▲, ▼]<br />
buttons to select on option, at last press [ok]<br />
button. Or press [◄, ►] buttons to select Auto or<br />
PCM.<br />
Auto: The play audio track is the stream has.<br />
PCM: It will make Dolby track to PCM track and<br />
then play it, at the channel has Dolby track<br />
6. Dolby Digital HDMI: Press [ok] button, then press<br />
[▲, ▼] buttons to select on option, at last press [ok]<br />
button. Or press [◄, ►] buttons to select ON or OFF.<br />
Note: When you <strong>co</strong>nnect with HDMI, if select ON<br />
and the TV don’t play the Dolby track, it is not audio<br />
output at the channels that has Dolby track.<br />
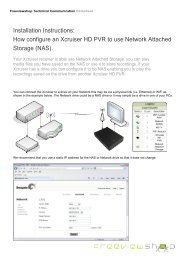
7. Browser Screen Size: Press [ok] button and select<br />
YES to enter into. The default is to adjust top. You can<br />
use [▲, ▼] buttons to adjust top. Then press [ok]<br />
button to adjust bottom, and use [▲, ▼] buttons to<br />
adjust . The order is top -> bottom -> left -> right. Left<br />
and right use [◄, ►] buttons to adjust.<br />
36