Digital Trunking â Desktop/Mobile Radio Scanner - Radio Shack
Digital Trunking â Desktop/Mobile Radio Scanner - Radio Shack
Digital Trunking â Desktop/Mobile Radio Scanner - Radio Shack
You also want an ePaper? Increase the reach of your titles
YUMPU automatically turns print PDFs into web optimized ePapers that Google loves.
Creating Scannable Objects<br />
Creating Scannable Objects<br />
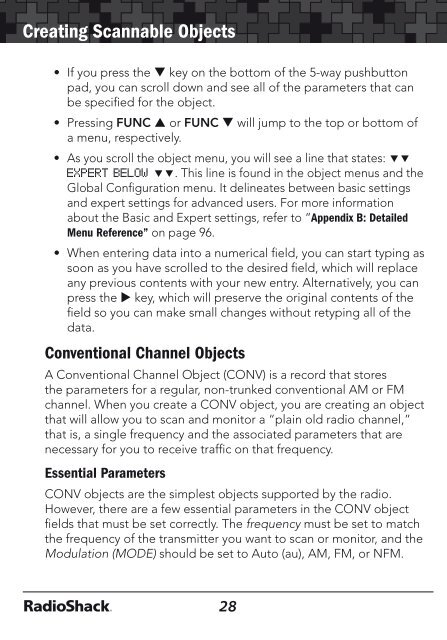
• If you press the key on the bottom of the 5-way pushbutton<br />
pad, you can scroll down and see all of the parameters that can<br />
be specified for the object.<br />
• Pressing FUNC or FUNC will jump to the top or bottom of<br />
a menu, respectively.<br />
• As you scroll the object menu, you will see a line that states: <br />
EXPERT BELOW . This line is found in the object menus and the<br />
Global Configuration menu. It delineates between basic settings<br />
and expert settings for advanced users. For more information<br />
about the Basic and Expert settings, refer to “Appendix B: Detailed<br />
Menu Reference” on page 96.<br />
• When entering data into a numerical field, you can start typing as<br />
soon as you have scrolled to the desired field, which will replace<br />
any previous contents with your new entry. Alternatively, you can<br />
press the key, which will preserve the original contents of the<br />
field so you can make small changes without retyping all of the<br />
data.<br />
Conventional Channel Objects<br />
A Conventional Channel Object (CONV) is a record that stores<br />
the parameters for a regular, non-trunked conventional AM or FM<br />
channel. When you create a CONV object, you are creating an object<br />
that will allow you to scan and monitor a “plain old radio channel,”<br />
that is, a single frequency and the associated parameters that are<br />
necessary for you to receive traffic on that frequency.<br />
Essential Parameters<br />
CONV objects are the simplest objects supported by the radio.<br />
However, there are a few essential parameters in the CONV object<br />
fields that must be set correctly. The frequency must be set to match<br />
the frequency of the transmitter you want to scan or monitor, and the<br />
Modulation (MODE) should be set to Auto (au), AM, FM, or NFM.<br />
28<br />
Note: When MODE is set for Auto, the scanner will automatically<br />
select the default mode based on the frequency you enter. In most<br />
cases it will not be necessary to change MODE.<br />
We also recommend labeling your CONV object by giving it a name<br />
in the TAG field. This makes it easier to find the CONV object later<br />
and identifies it when the scanner stops to monitor activity.<br />
Creating a CONV Object<br />
1. Press PROG to put scanner in Program Mode.<br />
2. Press NEW softkey to create new object.<br />
3. Press CONV softkey to enter a conventional channel object.<br />
4. Press to scroll through the conventional channel object<br />
parameters until the flashing cursor appears next to the Freq:<br />
label.<br />
5. Use the number keys and • to enter the frequency, including the<br />
decimal point.<br />
6. Press ENT or the DONE softkey to store the frequency parameter<br />
in your conventional object.<br />
Note: Go to www.radioreference.com for up-to-date frequency<br />
information.<br />
Changing Text Tags<br />
By default, your new conventional object will be tagged “Channel.”<br />
We recommend that you rename your CONV object, making it easier<br />
to find it later, and identifying it when the scanner stops to monitor<br />
activity.<br />
To change the tag:<br />
1. Press until the cursor highlights Tag:.<br />
2. Press SEL to edit the tag.<br />
3. Enter the text using the text keys (up to 16 characters).<br />
29


