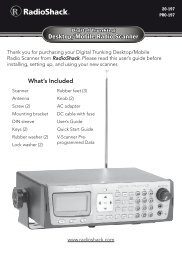
Digital Trunking â Desktop/Mobile Radio Scanner - Radio Shack
Digital Trunking â Desktop/Mobile Radio Scanner - Radio Shack
Digital Trunking â Desktop/Mobile Radio Scanner - Radio Shack
You also want an ePaper? Increase the reach of your titles
YUMPU automatically turns print PDFs into web optimized ePapers that Google loves.
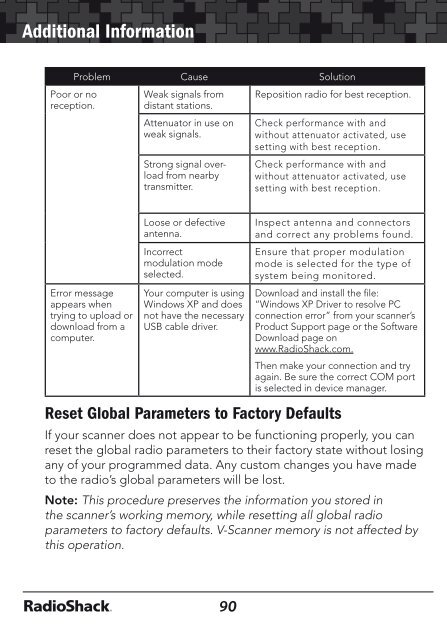
Additional Information<br />
Additional Information<br />
Poor or no<br />
reception.<br />
Problem Cause Solution<br />
Error message<br />
appears when<br />
trying to upload or<br />
download from a<br />
computer.<br />
Weak signals from<br />
distant stations.<br />
Attenuator in use on<br />
weak signals.<br />
Strong signal overload<br />
from nearby<br />
transmitter.<br />
Loose or defective<br />
antenna.<br />
Incorrect<br />
modulation mode<br />
selected.<br />
Your computer is using<br />
Windows XP and does<br />
not have the necessary<br />
USB cable driver.<br />
Reposition radio for best reception.<br />
Check performance with and<br />
without attenuator activated, use<br />
setting with best reception.<br />
Check performance with and<br />
without attenuator activated, use<br />
setting with best reception.<br />
Inspect antenna and connectors<br />
and correct any problems found.<br />
Ensure that proper modulation<br />
mode is selected for the type of<br />
system being monitored.<br />
Download and install the file:<br />
“Windows XP Driver to resolve PC<br />
connection error” from your scanner’s<br />
Product Support page or the Software<br />
Download page on<br />
www.<strong>Radio</strong><strong>Shack</strong>.com.<br />
Then make your connection and try<br />
again. Be sure the correct COM port<br />
is selected in device manager.<br />
Reset Global Parameters to Factory Defaults<br />
If your scanner does not appear to be functioning properly, you can<br />
reset the global radio parameters to their factory state without losing<br />
any of your programmed data. Any custom changes you have made<br />
to the radio’s global parameters will be lost.<br />
Note: This procedure preserves the information you stored in<br />
the scanner’s working memory, while resetting all global radio<br />
parameters to factory defaults. V-<strong>Scanner</strong> memory is not affected by<br />
this operation.<br />
1. Turn off the scanner, then turn it on again.<br />
The scanner briefly displays the DSP boot version, and then the<br />
Welcome/Owner screen is displayed.<br />
2. Press 0 while the scanner is displaying the Welcome/Owner<br />
screen. The scanner displays:<br />
System Tests:<br />
Select a Test...<br />
Exits if no key<br />
is pressed<br />
3. Press 2. The scanner displays:<br />
Init GLOB data<br />
To factory state<br />
ENTER if APPROVE<br />
CLEAR to EXIT<br />
4. Press ENT. The scanner displays:<br />
GLOB EEPROM area<br />
Initialized to<br />
defaults.<br />
Press any key.<br />
5. Press any key on the keypad to proceed. The scanner will reboot<br />
with file system and global parameters reset to factory defaults.<br />
90<br />
91


