ecoTEC pro - Vaillant
ecoTEC pro - Vaillant
ecoTEC pro - Vaillant

You also want an ePaper? Increase the reach of your titles
YUMPU automatically turns print PDFs into web optimized ePapers that Google loves.
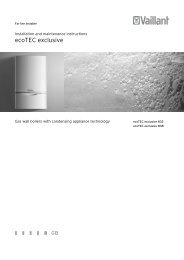
12.1 Measuring the CO2 concentration<br />
i<br />
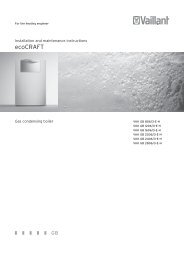
The boiler is fitted with a flue gas analysis point<br />
(1). A suitable flue gas analyser can be connected<br />
to this point to establish the combustion<br />
performance of the boiler.<br />
> Remove the front casing (¬ section 4.7).<br />
> Start the testing <strong>pro</strong>gram P.01 (¬ section 10.2).<br />
> Wait at least 5 minutes until the boiler reaches its operating<br />
temperature.<br />
> Measure the CO2 concentration at the flue gas analysis<br />
point (1). Compare the measured value with the corresponding<br />
value in ¬ table 12.1.<br />
> If all these points are as required, <strong>pro</strong>ceed as described<br />
in ¬ section 12.2.<br />
> If one of the flue gas values is greater than the acceptable<br />
values in ¬ table 12.1, then <strong>pro</strong>ceed as described in<br />
the following ¬ section 12.1.4.<br />
12.1.4 Adjusting the CO2 concentration (or the air<br />
ratio)<br />
a<br />
Danger!<br />
Increased risk of poisoning due to incorrect<br />
settings!<br />
If one of the flue gas values is greater than<br />
the acceptable values in ¬ table 12.1 then:<br />
> Check the integrity of the complete flue<br />
gas installation.<br />
> Check the integrity of the combustion<br />
circuit seals.<br />
> Check the gas inlet working pressure.<br />
> Check the gas flow rate.<br />
1<br />
Inspection and maintenance 12<br />
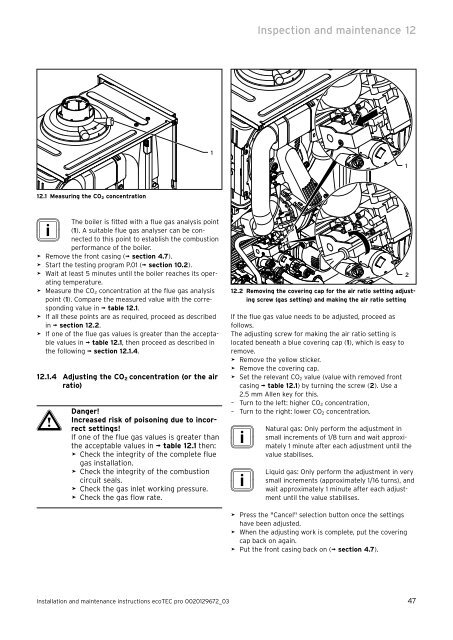
12.2 Removing the covering cap for the air ratio setting adjusting<br />
screw (gas setting) and making the air ratio setting<br />
If the flue gas value needs to be adjusted, <strong>pro</strong>ceed as<br />
follows.<br />
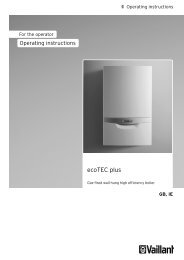
The adjusting screw for making the air ratio setting is<br />
located beneath a blue covering cap (1), which is easy to<br />
remove.<br />
> Remove the yellow sticker.<br />
> Remove the covering cap.<br />
> Set the relevant CO2 value (value with removed front<br />
casing ¬ table 12.1) by turning the screw (2). Use a<br />
2.5 mm Allen key for this.<br />
– Turn to the left: higher CO2 concentration,<br />
– Turn to the right: lower CO2 concentration.<br />
i Natural<br />
i Liquid<br />
gas: Only perform the adjustment in<br />
small increments of 1/8 turn and wait ap<strong>pro</strong>ximately<br />
1 minute after each adjustment until the<br />
value stabilises.<br />
gas: Only perform the adjustment in very<br />
small increments (ap<strong>pro</strong>ximately 1/16 turns), and<br />
wait ap<strong>pro</strong>ximately 1 minute after each adjustment<br />
until the value stabilises.<br />
> Press the "Cancel" selection button once the settings<br />
have been adjusted.<br />
> When the adjusting work is complete, put the covering<br />
cap back on again.<br />
> Put the front casing back on (¬ section 4.7).<br />
Installation and maintenance instructions <strong>ecoTEC</strong> <strong>pro</strong> 0020129672_03 47<br />
1<br />
2