Installation Manual - Fireplaces
Installation Manual - Fireplaces
Installation Manual - Fireplaces

You also want an ePaper? Increase the reach of your titles
YUMPU automatically turns print PDFs into web optimized ePapers that Google loves.
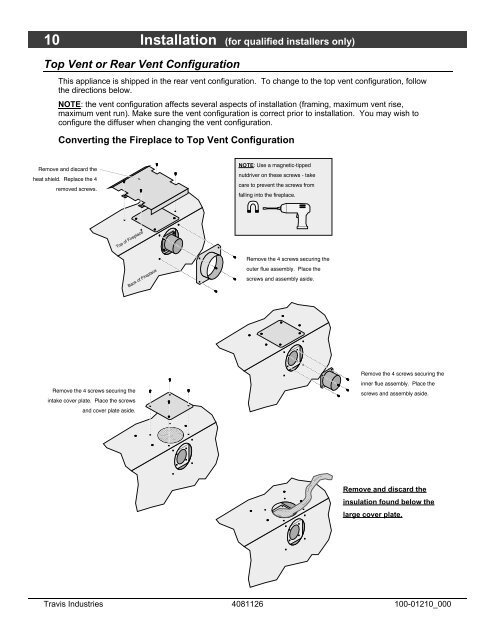
10 <strong>Installation</strong> (for qualified installers only)Top Vent or Rear Vent ConfigurationThis appliance is shipped in the rear vent configuration. To change to the top vent configuration, followthe directions below.NOTE: the vent configuration affects several aspects of installation (framing, maximum vent rise,maximum vent run). Make sure the vent configuration is correct prior to installation. You may wish toconfigure the diffuser when changing the vent configuration.Converting the Fireplace to Top Vent ConfigurationRemove and discard theheat shield. Replace the 4removed screws.NOTE: Use a magnetic-tippednutdriver on these screws - takecare to prevent the screws fromfalling into the fireplace.Top of FireplaceBack of FireplaceRemove the 4 screws securing theouter flue assembly. Place thescrews and assembly aside.Remove the 4 screws securing theintake cover plate. Place the screwsand cover plate aside.Remove the 4 screws securing theinner flue assembly. Place thescrews and assembly aside.Remove and discard theinsulation found below thelarge cover plate.Travis Industries 4081126 100-01210_000