VersaLASER® (VLS) User Guide VLS2.30, VLS3.50
VersaLASER® (VLS) User Guide VLS2.30, VLS3.50
VersaLASER® (VLS) User Guide VLS2.30, VLS3.50
You also want an ePaper? Increase the reach of your titles
YUMPU automatically turns print PDFs into web optimized ePapers that Google loves.
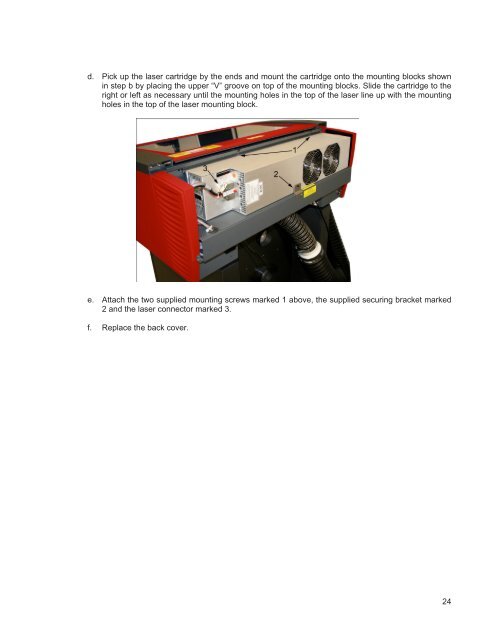
d. Pick up the laser cartridge by the ends and mount the cartridge onto the mounting blocks shown<br />
in step b by placing the upper “V” groove on top of the mounting blocks. Slide the cartridge to the<br />
right or left as necessary until the mounting holes in the top of the laser line up with the mounting<br />
holes in the top of the laser mounting block.<br />
e. Attach the two supplied mounting screws marked 1 above, the supplied securing bracket marked<br />
2 and the laser connector marked 3.<br />
f. Replace the back cover.<br />
24


