VersaLASER® (VLS) User Guide VLS2.30, VLS3.50
VersaLASER® (VLS) User Guide VLS2.30, VLS3.50
VersaLASER® (VLS) User Guide VLS2.30, VLS3.50

Create successful ePaper yourself
Turn your PDF publications into a flip-book with our unique Google optimized e-Paper software.
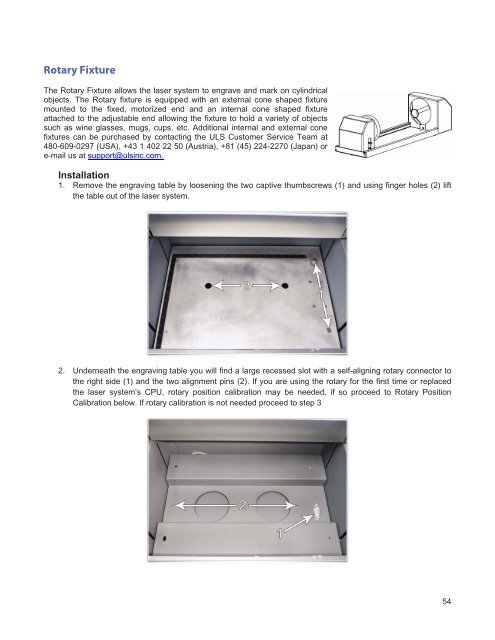
Rotary Fixture<br />
The Rotary Fixture allows the laser system to engrave and mark on cylindrical<br />
objects. The Rotary fixture is equipped with an external cone shaped fixture<br />
mounted to the fixed, motorized end and an internal cone shaped fixture<br />
attached to the adjustable end allowing the fixture to hold a variety of objects<br />
such as wine glasses, mugs, cups, etc. Additional internal and external cone<br />
fixtures can be purchased by contacting the ULS Customer Service Team at<br />
480-609-0297 (USA), +43 1 402 22 50 (Austria), +81 (45) 224-2270 (Japan) or<br />
e-mail us at support@ulsinc.com.<br />
Installation<br />
1. Remove the engraving table by loosening the two captive thumbscrews (1) and using finger holes (2) lift<br />
the table out of the laser system.<br />
2. Underneath the engraving table you will find a large recessed slot with a self-aligning rotary connector to<br />
the right side (1) and the two alignment pins (2). If you are using the rotary for the first time or replaced<br />
the laser system’s CPU, rotary position calibration may be needed, if so proceed to Rotary Position<br />
Calibration below. If rotary calibration is not needed proceed to step 3<br />
54