VersaLASER® (VLS) User Guide VLS2.30, VLS3.50
VersaLASER® (VLS) User Guide VLS2.30, VLS3.50
VersaLASER® (VLS) User Guide VLS2.30, VLS3.50

You also want an ePaper? Increase the reach of your titles
YUMPU automatically turns print PDFs into web optimized ePapers that Google loves.
Maintenance<br />
As you use the cutting table, material from the cutting process may fall through the honeycomb surface and<br />
collect in the bottom of the cutting table. Periodically check this area and remove any material that has<br />
collected there.<br />
CAUTION: If left to build up in the bottom of the cutting table, this scrap material can be a fire hazard.<br />
The honeycomb material that makes up the support surface for materials being cut will wear out over time<br />
and can easily be replaced. New honeycomb can be purchased from the Customer Service Team at ULS. To<br />
replace the material, remove back panel of the cutting table. Remove the old honeycomb and replace it with a<br />
new one. Reinstall the back panel.<br />
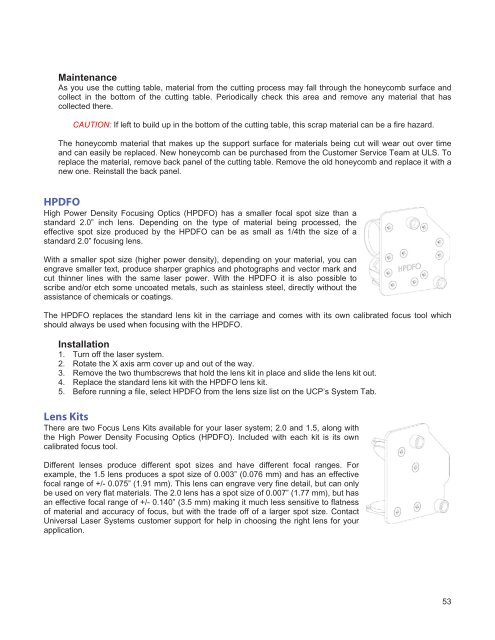
HPDFO<br />
High Power Density Focusing Optics (HPDFO) has a smaller focal spot size than a<br />
standard 2.0” inch lens. Depending on the type of material being processed, the<br />
effective spot size produced by the HPDFO can be as small as 1/4th the size of a<br />
standard 2.0” focusing lens.<br />
With a smaller spot size (higher power density), depending on your material, you can<br />
engrave smaller text, produce sharper graphics and photographs and vector mark and<br />
cut thinner lines with the same laser power. With the HPDFO it is also possible to<br />
scribe and/or etch some uncoated metals, such as stainless steel, directly without the<br />
assistance of chemicals or coatings.<br />
The HPDFO replaces the standard lens kit in the carriage and comes with its own calibrated focus tool which<br />
should always be used when focusing with the HPDFO.<br />
Installation<br />
1. Turn off the laser system.<br />
2. Rotate the X axis arm cover up and out of the way.<br />
3. Remove the two thumbscrews that hold the lens kit in place and slide the lens kit out.<br />
4. Replace the standard lens kit with the HPDFO lens kit.<br />
5. Before running a file, select HPDFO from the lens size list on the UCP’s System Tab.<br />
Lens Kits<br />
There are two Focus Lens Kits available for your laser system; 2.0 and 1.5, along with<br />
the High Power Density Focusing Optics (HPDFO). Included with each kit is its own<br />
calibrated focus tool.<br />
Different lenses produce different spot sizes and have different focal ranges. For<br />
example, the 1.5 lens produces a spot size of 0.003” (0.076 mm) and has an effective<br />
focal range of +/- 0.075” (1.91 mm). This lens can engrave very fine detail, but can only<br />
be used on very flat materials. The 2.0 lens has a spot size of 0.007” (1.77 mm), but has<br />
an effective focal range of +/- 0.140” (3.5 mm) making it much less sensitive to flatness<br />
of material and accuracy of focus, but with the trade off of a larger spot size. Contact<br />
Universal Laser Systems customer support for help in choosing the right lens for your<br />
application.<br />
53