Create successful ePaper yourself
Turn your PDF publications into a flip-book with our unique Google optimized e-Paper software.
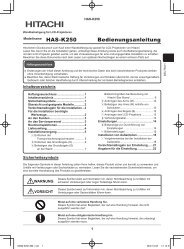
STARTUP LOGO<br />
You can switch the logo on/off that is displayed when<br />
starting up the projector. Press I H to select the<br />
required option. STARTUP LOGO will be displayed for<br />
30 seconds.<br />
� ON Active<br />
� OFF Deactive<br />
� USER Display the original text<br />
� Editing the original text<br />
If you select USER, you can display the 2 lines of<br />
original text up to 40 characters in 1 line instead of<br />
the logo.<br />
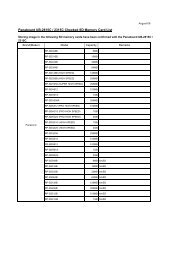
TEXT CHANGE<br />
OK CANCEL<br />
ALL DELETE<br />
1. Select USER and press ENTER.<br />
2. Select the required line to enter or edit the original<br />
text, and press the ENTER button.<br />
3. Enter the characters and repeat until finish the line.<br />
� Use F G I H to specify the location of the required<br />
character, and press the ENTER button.<br />
� Move the cursor to ALL DELETE and press the<br />
ENTER button to delete all the entered text line.<br />
� Press the DEFAULT button to delete the last entered<br />
character or indicated with the cursor in the text line.<br />
� To insert a character in the entered text line, move<br />
the cursor to the text box to select the required place<br />
and press G to select a character.<br />
4. Select OK and press the ENTER button to set the<br />
entered text in a box.<br />
� Press G and edit the TEXT2 if you need to, and<br />
repeat the step 3.<br />
AUTO SETUP<br />
DISPLAY OPTION menu<br />
You can turn off the AUTO SETUP button function for<br />
when the COMPUTER signal is detected.<br />
� AUTO When the projector detects a<br />
COMPUTER or DVI signal, adjust<br />
the projected image position<br />
automatically for SHIFT, SIGNAL<br />
SEARCH, DOT CLOCK and CLOCK<br />
PHASE.<br />
� BUTTON Only when the AUTO SETUP button<br />
is pressed, the projected image<br />
position will be adjusted for DOT<br />
CLOCK and CLOCK PHASE. See<br />
“Remote control” on page 16.<br />
NOTE:<br />
• Usually the recommended setting is AUTO.<br />
SIGNAL SEARCH<br />
You can turn off the auto signal detecting system.<br />
� ON Detect the input signal from the<br />
terminals and project the image.<br />
� OFF Deactive<br />
NOTE:<br />
• SIGNAL SEARCH is not available when any input<br />
signal is projecting.<br />
• Usually the recommended setting is ON.<br />
BACK COLOR<br />
You can choose a BLUE or BLACK screen for when the<br />
projector is idle. Press I H to select the required option.<br />
WIDE MODE<br />
When projecting WIDE signals, switch to ON to display<br />
the image in well adjusted size.<br />
� AUTO Automatic detective system<br />
� OFF For 4:3 signals<br />
� ON For WIDE signals<br />
(16:9, 16:10 and 15:9)<br />
SXGA MODE<br />
You can switch the projection mode between SXGA+<br />
and SXGA for SXGA signals. Press I H to select the<br />
required option.<br />
� SXGA Smaller setting<br />
� SXGA+ Larger setting<br />
<strong>ENGLISH</strong> - 41<br />
Settings