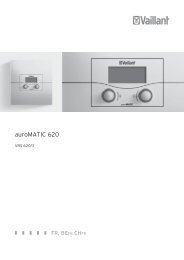
vrc 410 bedienungs- und montageanleitung operating and ... - Vaillant
vrc 410 bedienungs- und montageanleitung operating and ... - Vaillant
vrc 410 bedienungs- und montageanleitung operating and ... - Vaillant
- No tags were found...

Create successful ePaper yourself
Turn your PDF publications into a flip-book with our unique Google optimized e-Paper software.
DE GB FR<br />
2.2 Elektrischer Anschluß<br />
Der elektrische Anschluß darf nur von<br />
einem anerkannten Fachh<strong>and</strong>werksbetrieb<br />
vorgenommen werden.<br />
Lebensgefahr durch Stromschlag<br />
an spannungsführenden<br />
Anschlüssen.<br />
Vor Arbeiten am Gerät die<br />
Stromzufuhr abschalten <strong>und</strong> vor<br />
Wiedereinschalten sichern.<br />
● Öffnen Sie den Schaltkasten des<br />
Heizgerätes gemäß der Installationsanleitung.<br />
● Nehmen Sie die Anschlußverdrahtung<br />
gemäß der nebenstehenden<br />
Abbildung vor.<br />
☞ Auf dem Steckplatz X8 im Schaltkasten<br />
des Heizgerätes wird der<br />
Außenfühler angeschlossen.<br />
☞ Bei Anschluß des VRC <strong>410</strong> muss eine<br />
Brücke zwischen Klemme 3 <strong>und</strong> 4 des<br />
Heizgerätes eingesetzt werden.<br />
☞ Rücklauftemperaturregelung<br />
(Fußbodenheizung): Fühler VRC 692<br />
im Rücklauf montieren <strong>und</strong><br />
anschließen. Wegen der um ca. 20°C<br />
höheren Vorlauftemperatur, die<br />
Heizkurve flacher einstellen (siehe<br />
Kapitel 4.5 <strong>und</strong> Kapitel 6 unter<br />
"Hydraulische Weiche").<br />
Hydraulische Weiche: Tauchfühler in<br />
der Weiche montieren, entsprechend<br />
der Abbildung anschließen <strong>und</strong><br />
Einstellung (Kapitel 6<br />
Sonderfunktionen) anpassen.<br />
2.2 Electrical connection<br />
The electrical connection should only be<br />
completed by a professional installer.<br />
●<br />
●<br />
There is a danger of fatal injury<br />
due to electric shock in all live<br />
sections.<br />
ALWAYS shut off the power<br />
supply <strong>and</strong> ensure it cannot be<br />
reconnected by accident before<br />
starting work on the system.<br />
Open the boiler electronics control<br />
box of the heating appliance as<br />
shown in the installation instructions.<br />
Connect the wiring system as<br />
indicated in the diagram shown here.<br />
☞ The external sensor is connected to<br />
plug-in terminal X8 in the boiler<br />
electronics control box.<br />
☞ When connecting the VRC <strong>410</strong> unit,<br />
there must be a bridge connection<br />
between terminals 3 <strong>and</strong> 4 of the<br />
heating appliance.<br />
☞ Return temperature regulation<br />
(<strong>und</strong>erfloor heating system): Mount<br />
Sensor VRC 692 in the return flow<br />
stream <strong>and</strong> attach it in place. Set the<br />
heating curve somewhat flatter due to<br />
the roughly 20°C higher flow<br />
temperature (see Chapter 4.5 <strong>and</strong><br />
Chapter 6 <strong>und</strong>er "3-way valve").<br />
The 3-way valve: Mount the<br />
submerging sensor in the 3-way valve<br />
<strong>and</strong> connect up <strong>and</strong> adjust according<br />
to the figure shown (Chapter 6<br />
Special functions).<br />
2.2 Raccordement électrique<br />
Le raccordement électrique ne doit être<br />
effectué que par une entreprise<br />
spécialisée et reconnue.<br />
Risque d’électrocution sur des<br />
branchements conducteurs de<br />
tension. Avant les travaux sur<br />
les appareils, couper l'alimentation<br />
électrique, en particulier<br />
de la chaudiére et protéger<br />
contre une remise en route.<br />
● Ouvrez le coffret de comm<strong>and</strong>e<br />
électrique de l'appareil de chauffage<br />
d'après les instructions d'installation.<br />
● Procédez au câblage de raccordement<br />
d'après la figure ci-contre.<br />
☞ La sonde extérieure est raccordée sur<br />
le connecteur X8 dans le coffret de<br />
comm<strong>and</strong>e électrique de l'appareil de<br />
chauffage.<br />
☞ Au raccordement du VRC <strong>410</strong> il faut<br />
prévoir un pont entre la borne 3 et 4<br />
de l'appareil de chauffage.<br />
☞ Régulation de la température dans le<br />
circuit de retour (chauffage par le sol):<br />
monter, puis raccorder le palpeur<br />
VRC 692 dans le circuit de retour. En<br />
raison de la température aller<br />
d'environ 20 °C plus élevée, il<br />
convient de régler la courbe de<br />
chauffe de manière plus plane (voir<br />
chapitres 4.5 et 6 au point «<br />
aiguillage hydraulique »).<br />
Aiguillage hydraulique : monter le<br />
palpeur par immersion dans<br />
l'aiguillage, le brancher en se référant<br />
à l'illustration et adapter le réglage<br />
en conséquence (voir chapitre 6<br />
Fonctions spéciales).<br />
55