vrc 410 bedienungs- und montageanleitung operating and ... - Vaillant
vrc 410 bedienungs- und montageanleitung operating and ... - Vaillant
vrc 410 bedienungs- und montageanleitung operating and ... - Vaillant
- No tags were found...

Create successful ePaper yourself
Turn your PDF publications into a flip-book with our unique Google optimized e-Paper software.
DE GB FR<br />
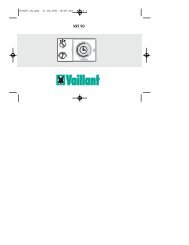
4.3 Verdrahtung des DCF-Empfängers<br />
●<br />
Verdrahten Sie die Anschlußklemmen<br />
entsprechend dem Anschlußschema<br />
gemäß der nebenstehenden<br />
Abbildungen.<br />
☞ Achten Sie dabei auf den Verwendungszweck<br />
des DCF-Empfängers:<br />
Anschluß bei Verwendung als DCF-<br />
Empfänger mit integriertem<br />
Außenfühler: linke Abbildung<br />
Anschluß bei Verwendung als DCF-<br />
Empfänger mit zusätzlichem externen<br />
Außenfühler: rechte Abbildung<br />
●<br />
Stellen Sie sicher, dass die Gehäusedichtung<br />
korrekt im Gehäuseoberteil<br />
befestigt ist <strong>und</strong><br />
drücken Sie das Gehäuseoberteil<br />
auf das Gehäuseunterteil, bis es<br />
hörbar eingerastet ist.<br />
Befestigen Sie das Gehäuseoberteil<br />
mit den beiliegenden Schrauben auf<br />
dem Gehäuseunterteil.<br />
☞ Die Synchronisationszeit des DCF-<br />
Empfangs beträgt etwa 5 Minuten,<br />
unter ungünstigen Umständen auch<br />
etwas länger. In dieser Zeit wird die<br />
Uhrzeit des Regelgerätes automatisch<br />
eingestellt.<br />
4.3 Connecting the DCF receiver<br />
(not currently available in GB)<br />
● Connect the device to the terminals<br />
as shown in the wiring diagram<br />
illustrated here.<br />
☞ for the electrical connections you have<br />
to consider the use of the<br />
DCF-receiver:<br />
the use as DCF-receiver with<br />
integrated outside sensor: left figure<br />
the use as DCF-receiver with external<br />
outside sensor: right figure<br />
Ensure that the housing seal is<br />
correctly attached to the top of<br />
the unit before pressing the top<br />
onto the bottom section of the<br />
housing until you hear it click<br />
into place.<br />
●<br />
Fix the cover top (1) with the supplied<br />
screws to cover base (2).<br />
☞ DCF reception synchronization time is<br />
about five minutes (or longer <strong>und</strong>er<br />
unfavorable circumstances).<br />
The clock time of the control device is<br />
automatically set during this period.<br />
4.3 Câblage du récepteur DCF<br />
●<br />
Câblez les bornes de raccordement<br />
d'après le schéma de connexion de<br />
la figure ci-contre.<br />
☞ Pour le câblage électrique, il est<br />
impératif de tenir compte du mode<br />
d'utilisation du récepteur DCF:<br />
utilisation comme récepteur DCF avec<br />
capteur extérieur intégré: figure à<br />
gauche<br />
●<br />
utilisation comme récepteur DCF avec<br />
capteur extérieur externe: figure à<br />
droite<br />
Assurez vous que la garniture<br />
d'étanchéité est correctement<br />
fixée dans la partie supérieure<br />
du boîtier et enfoncez la partie<br />
supérieure sur le boîtier.<br />
Avec les vis jointes, fixer la partie<br />
supérieure du boîtier (1) sur la partie<br />
inférieure (2).<br />
☞ Le temps de synchronisation de la<br />
réception DCF est d'environ 5 minutes<br />
en conditions défavorables un peu<br />
plus longtemps. Pendant ce temps,<br />
l'heure de l'appareil de réglage est<br />
réglée automatiquement.<br />
67