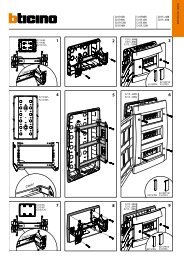
Mod. 1092 Sch./Ref. 1092/602
Mod. 1092 Sch./Ref. 1092/602
Mod. 1092 Sch./Ref. 1092/602
- No tags were found...

Create successful ePaper yourself
Turn your PDF publications into a flip-book with our unique Google optimized e-Paper software.
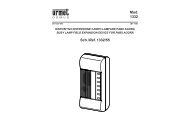
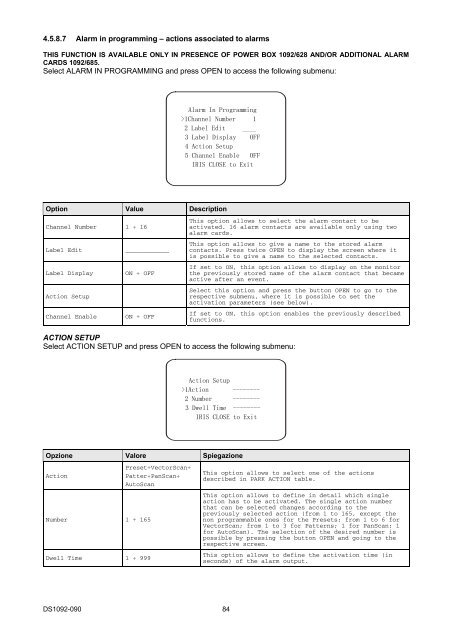
4.5.8.7 Alarm in programming – actions associated to alarmsTHIS FUNCTION IS AVAILABLE ONLY IN PRESENCE OF POWER BOX <strong>1092</strong>/628 AND/OR ADDITIONAL ALARMCARDS <strong>1092</strong>/685.Select ALARM IN PROGRAMMING and press OPEN to access the following submenu:Alarm In Programming>1Channel Number 12 Label Edit ____3 Label Display OFF4 Action Setup5 Channel Enable OFFIRIS CLOSE to ExitOption Value DescriptionChannel Number 1 ÷ 16Label EditLabel DisplayAction SetupChannel Enable____________ON ÷ OFFON ÷ OFFThis option allows to select the alarm contact to beactivated. 16 alarm contacts are available only using twoalarm cards.This option allows to give a name to the stored alarmcontacts. Press twice OPEN to display the screen where itis possible to give a name to the selected contacts.If set to ON, this option allows to display on the monitorthe previously stored name of the alarm contact that becameactive after an event.Select this option and press the button OPEN to go to therespective submenu, where it is possible to set theactivation parameters (see below).If set to ON, this option enables the previously describedfunctions.ACTION SETUPSelect ACTION SETUP and press OPEN to access the following submenu:Action Setup>1Action --------2 Number --------3 Dwell Time --------IRIS CLOSE to ExitOpzione Valore SpiegazioneActionNumber 1 ÷ 165Dwell Time 1 ÷ 999Preset÷VectorScan÷Patter÷PanScan÷AutoScanThis option allows to select one of the actionsdescribed in PARK ACTION table.This option allows to define in detail which singleaction has to be activated. The single action numberthat can be selected changes according to thepreviously selected action (from 1 to 165, except thenon programmable ones for the Presets; from 1 to 6 forVectorScan; from 1 to 3 for Patterns; 1 for PanScan; 1for AutoScan). The selection of the desired number ispossible by pressing the button OPEN and going to therespective screen.This option allows to define the activation time (inseconds) of the alarm output.DS<strong>1092</strong>-090 84