MyAccount_User_Manual_V2 4_02-25-101 _2 - Nefcom Internet
MyAccount_User_Manual_V2 4_02-25-101 _2 - Nefcom Internet
MyAccount_User_Manual_V2 4_02-25-101 _2 - Nefcom Internet

Create successful ePaper yourself
Turn your PDF publications into a flip-book with our unique Google optimized e-Paper software.
130 N 4 th Street,Macclenny, FL 32063<br />
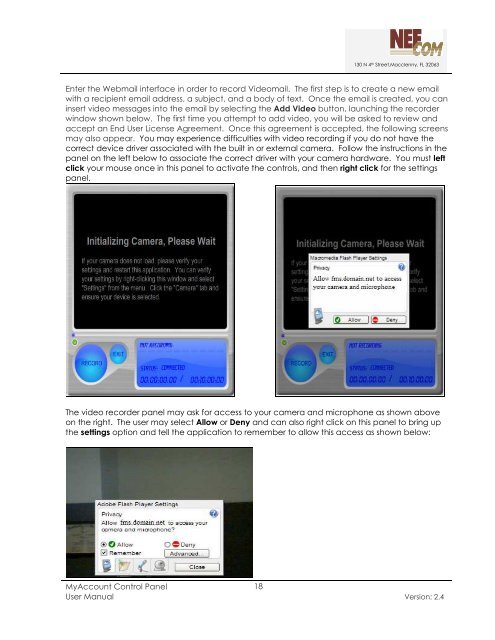
Enter the Webmail interface in order to record Videomail. The first step is to create a new email<br />
with a recipient email address, a subject, and a body of text. Once the email is created, you can<br />
insert video messages into the email by selecting the Add Video button, launching the recorder<br />
window shown below. The first time you attempt to add video, you will be asked to review and<br />
accept an End <strong>User</strong> License Agreement. Once this agreement is accepted, the following screens<br />
may also appear. You may experience difficulties with video recording if you do not have the<br />
correct device driver associated with the built in or external camera. Follow the instructions in the<br />
panel on the left below to associate the correct driver with your camera hardware. You must left<br />
click your mouse once in this panel to activate the controls, and then right click for the settings<br />
panel.<br />
The video recorder panel may ask for access to your camera and microphone as shown above<br />
on the right. The user may select Allow or Deny and can also right click on this panel to bring up<br />
the settings option and tell the application to remember to allow this access as shown below:<br />
<strong>MyAccount</strong> Control Panel<br />
18<br />
<strong>User</strong> <strong>Manual</strong> Version: 2.4