Creating a Map with ArcMap - Tufts University
Creating a Map with ArcMap - Tufts University
Creating a Map with ArcMap - Tufts University

Create successful ePaper yourself
Turn your PDF publications into a flip-book with our unique Google optimized e-Paper software.
• Make sure that the Label field says Hood_Name. All the attribute fields are listed here, so you<br />
could choose a different one if you needed to.<br />
• You can choose the font, size and color of your labels by clicking on the Symbol... button – make<br />
the Neighborhood name bold <strong>with</strong> 12pt font.<br />
• When you are done, return to your map.<br />
• If you don’t like the results, adjust the label format again as you wish. Check out some of the<br />
predefined label styles.<br />
Interactively labeling some parks<br />
• Before we can label <strong>with</strong> an attribute field, we have to know which attribute field would be good<br />
as a label. Open the Parks attribute table (right-click on the layer name and choose Open<br />
Attribute Table).<br />
• Look through the table. You will see that a field called Park_Name contains the park name. We<br />
want to use this field for labels.<br />
• Close the table, and open the layer properties of Parks.<br />
• Click on the Labels tab.<br />
• Make sure that the Label field says Park_Name.<br />
• Make the park name italic.<br />
• When you are done, return to your map.<br />
• No labels appear yet. Try labeling all the park features at once by right-clicking on the layer name<br />
and choosing Label Features. There are a lot of labels and this makes for a rather messy map. We<br />
want to label only the largest parks.<br />
• Turn off the Label Features function.<br />
• To label features interactively (one by one) you need the Draw toolbar. Choose View-Toolbars,<br />
and click on the Draw.<br />
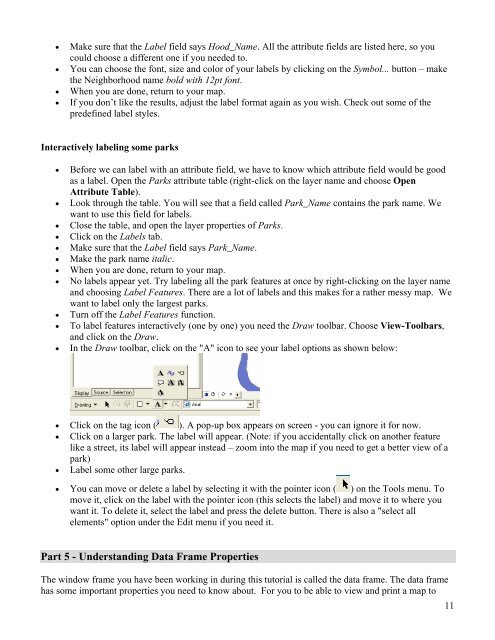
• In the Draw toolbar, click on the "A" icon to see your label options as shown below:<br />
• Click on the tag icon ( ). A pop-up box appears on screen - you can ignore it for now.<br />
• Click on a larger park. The label will appear. (Note: if you accidentally click on another feature<br />
like a street, its label will appear instead – zoom into the map if you need to get a better view of a<br />
park)<br />
• Label some other large parks.<br />
• You can move or delete a label by selecting it <strong>with</strong> the pointer icon ( ) on the Tools menu. To<br />
move it, click on the label <strong>with</strong> the pointer icon (this selects the label) and move it to where you<br />
want it. To delete it, select the label and press the delete button. There is also a "select all<br />
elements" option under the Edit menu if you need it.<br />
Part 5 - Understanding Data Frame Properties<br />
The window frame you have been working in during this tutorial is called the data frame. The data frame<br />
has some important properties you need to know about. For you to be able to view and print a map to<br />
11