SERVICE SPECIFICATIONS
SERVICE SPECIFICATIONS
SERVICE SPECIFICATIONS

You also want an ePaper? Increase the reach of your titles
YUMPU automatically turns print PDFs into web optimized ePapers that Google loves.
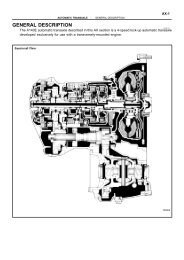
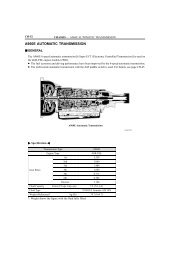
A46DE AUTOMATIC TRANSMISSION - REAR CLUTCH (A46DE)<br />
AT4884<br />
AT6292<br />
Printed<br />
Number<br />
AT6243<br />
AT4828<br />
Q00426<br />
5. REMOVE REAR CLUTCH PISTON<br />
(a) Place the rear clutch drum onto the center support.<br />
(b) Hold the No. 2 rear clutch piston with hand, apply<br />
compressed air to the center support to remove<br />
the rear clutch piston.<br />
(c) Remove the two O-rings from the piston.<br />
(d) Hold the rear clutch piston subassembly with<br />
hand, apply compressed air to the center support<br />
to remove the rear clutch piston subassembly.<br />
(e) Remove the two O-rings from the piston.<br />
REAR CLUTCH INSPECTION<br />
1. INSPECT DISC, PLATE AND FLANGE<br />
Check to see if the sliding surface of the disc, plate<br />
and flange are worn or burnt. If necessary, replace<br />
them.<br />
HINT:<br />
If the lining of the disc is peeling off or discolored,<br />
or even if parts of the printed numbers are<br />
defaced, replace all discs.<br />
Before assembling new discs, soak them in ATF<br />
for at least fifteen minutes.<br />
2. CHECK REAR CLUTCH PISTON<br />
(a) Check that check balls are free by shaking the<br />
piston.<br />
(b) Check that the valves do no leak by applying<br />
low-pressure compressed air.<br />
REAR CLUTCH ASSEMBLY<br />
AT-49<br />
1. INSTALL REAR CLUTCH PISTON SUBASSEMBLY<br />
(a) Coat new O-rings with ATF and install them onto<br />
the piston subassembly.<br />
(b) Install piston subassembly into the No. 2 rear clutch<br />
piston.