Installation Guide - Eset
Installation Guide - Eset
Installation Guide - Eset

You also want an ePaper? Increase the reach of your titles
YUMPU automatically turns print PDFs into web optimized ePapers that Google loves.
Now let’s move back to the first section again: General > Settings<br />
Administration <strong>Installation</strong> <strong>Guide</strong><br />
ThreatSense.Net is recommended to leave with default setup but you<br />
may review the settings if you wish.<br />
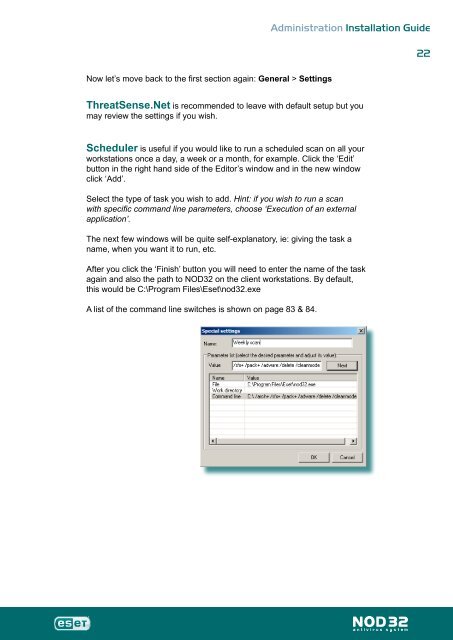
Scheduler is useful if you would like to run a scheduled scan on all your<br />
workstations once a day, a week or a month, for example. Click the ‘Edit’<br />
button in the right hand side of the Editor’s window and in the new window<br />
click ‘Add’.<br />
Select the type of task you wish to add. Hint: if you wish to run a scan<br />
with specific command line parameters, choose ‘Execution of an external<br />
application’.<br />
The next few windows will be quite self-explanatory, ie: giving the task a<br />
name, when you want it to run, etc.<br />
After you click the ‘Finish’ button you will need to enter the name of the task<br />
again and also the path to NOD32 on the client workstations. By default,<br />
this would be C:\Program Files\<strong>Eset</strong>\nod32.exe<br />
A list of the command line switches is shown on page 83 & 84.