Manual tehnic automate cafea Saeco Group 500
Manual tehnic automate cafea Saeco Group 500
Manual tehnic automate cafea Saeco Group 500

Create successful ePaper yourself
Turn your PDF publications into a flip-book with our unique Google optimized e-Paper software.
Warning<br />
The opening and possible switching on of the<br />
machine with the door open shall only be<br />
performed by authorized and technically qualified<br />
personnel. Do not leave the machine unattended<br />
while it is open.<br />
Give the key to qualified and authorized<br />
personnel only.<br />
Whenever the machine is switched on a test<br />
cycle is performed in order to verify the correct<br />
position of the moving parts and the presence<br />
of water and other products.<br />
6.7 Installation<br />
Important:<br />
When switched on, the machine automatically<br />
fills the water circuit and the related boilers. For<br />
a correct automatic installation in case of a water<br />
softener system being used, it is necessary that<br />
the latter is completely filled with water and<br />
properly relieved of any air bubbles.<br />
6.7.1 Cleaning and filling of resinbased<br />
water softener<br />
Before installing the water softener in the<br />
machine and using it, it is advisable to clean the<br />
resins and fill the water softener. Therefore,<br />
install the water softener already filled with water<br />
and cleaned. If you wish to carry out this<br />
operation directly in the machine, act as follows:<br />
- in the OPTION menu, disable the selfinstallation<br />
- insert the pipe of the bottom tap into a<br />
container suitable for this purpose<br />
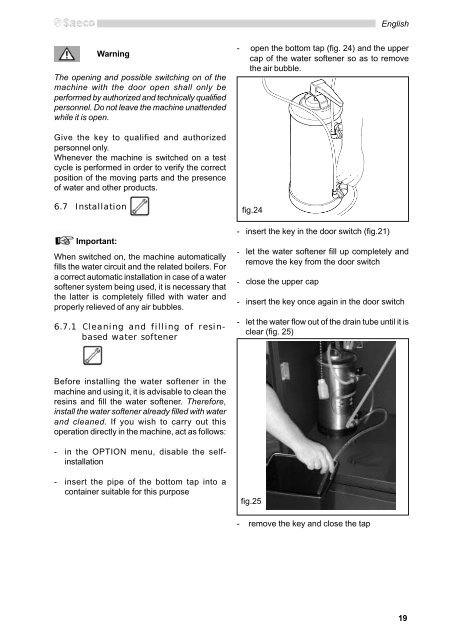
fig.24<br />
fig.25<br />
English<br />
- open the bottom tap (fig. 24) and the upper<br />
cap of the water softener so as to remove<br />
the air bubble.<br />
- insert the key in the door switch (fig.21)<br />
- let the water softener fill up completely and<br />
remove the key from the door switch<br />
- close the upper cap<br />
- insert the key once again in the door switch<br />
- let the water flow out of the drain tube until it is<br />
clear (fig. 25)<br />
- remove the key and close the tap<br />
19