Operations Manual - PRO-111FD - Pioneer
Operations Manual - PRO-111FD - Pioneer
Operations Manual - PRO-111FD - Pioneer

You also want an ePaper? Increase the reach of your titles
YUMPU automatically turns print PDFs into web optimized ePapers that Google loves.
Basic <strong>Operations</strong> For Television Viewing 03<br />
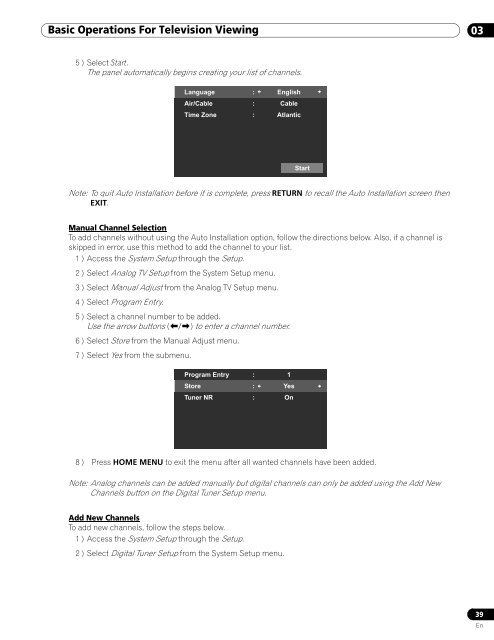
5 ) Select Start.<br />
The panel automatically begins creating your list of channels.<br />
Language : English<br />
Air/Cable : Cable<br />
Time Zone : Atlantic<br />
Start<br />
Note: To quit Auto Installation before it is complete, press RETURN to recall the Auto Installation screen then<br />
EXIT.<br />
<strong>Manual</strong> Channel Selection<br />
To add channels without using the Auto Installation option, follow the directions below. Also, if a channel is<br />
skipped in error, use this method to add the channel to your list.<br />
1 ) Access the System Setup through the Setup.<br />
2 ) Select Analog TV Setup from the System Setup menu.<br />
3 ) Select <strong>Manual</strong> Adjust from the Analog TV Setup menu.<br />
4 ) Select Program Entry.<br />
5 ) Select a channel number to be added.<br />
Use the arrow buttons (/) to enter a channel number.<br />
6 ) Select Store from the <strong>Manual</strong> Adjust menu.<br />
7 ) Select Yes from the submenu.<br />
Program Entry : 1<br />
Store : Yes<br />
Tuner NR : On<br />
8 ) Press HOME MENU to exit the menu after all wanted channels have been added.<br />
Note: Analog channels can be added manually but digital channels can only be added using the Add New<br />
Channels button on the Digital Tuner Setup menu.<br />
Add New Channels<br />
To add new channels, follow the steps below.<br />
1 ) Access the System Setup through the Setup.<br />
2 ) Select Digital Tuner Setup from the System Setup menu.<br />
39<br />
En