WL76* Digital Series YL76* Digital Series - Toshiba-OM.net
WL76* Digital Series YL76* Digital Series - Toshiba-OM.net
WL76* Digital Series YL76* Digital Series - Toshiba-OM.net

Create successful ePaper yourself
Turn your PDF publications into a flip-book with our unique Google optimized e-Paper software.
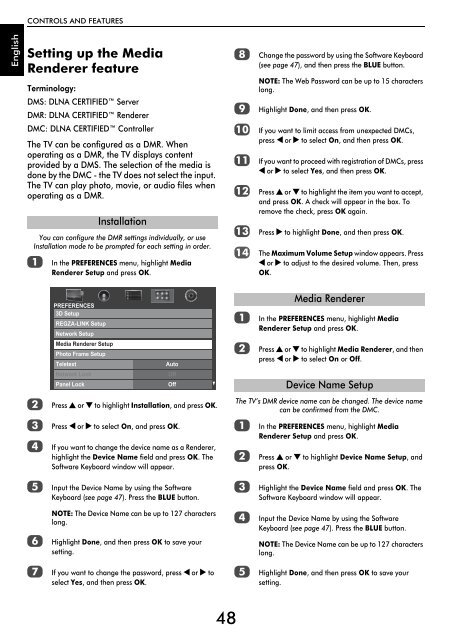
CONTROLS AND FEATURES<br />
English<br />
Setting up the Media<br />
Renderer feature<br />
Terminology:<br />
DMS: DLNA CERTIFIED Server<br />
DMR: DLNA CERTIFIED Renderer<br />
DMC: DLNA CERTIFIED Controller<br />
The TV can be configured as a DMR. When<br />
operating as a DMR, the TV displays content<br />
provided by a DMS. The selection of the media is<br />
done by the DMC - the TV does not select the input.<br />
The TV can play photo, movie, or audio files when<br />
operating as a DMR.<br />
You can configure the DMR settings individually, or use<br />
Installation mode to be prompted for each setting in order.<br />
a<br />
Installation<br />
In the PREFERENCES menu, highlight Media<br />
Renderer Setup and press OK.<br />
h<br />
i<br />
j<br />
k<br />
l<br />
m<br />
Change the password by using the Software Keyboard<br />
(see page 47), and then press the BLUE button.<br />
NOTE: The Web Password can be up to 15 characters<br />
long.<br />
Highlight Done, and then press OK.<br />
If you want to limit access from unexpected DMCs,<br />
press C or c to select On, and then press OK.<br />
If you want to proceed with registration of DMCs, press<br />
C or c to select Yes, and then press OK.<br />
Press B or b to highlight the item you want to accept,<br />
and press OK. A check will appear in the box. To<br />
remove the check, press OK again.<br />
Press c to highlight Done, and then press OK.<br />
The Maximum Volume Setup window appears. Press<br />
C or c to adjust to the desired volume. Then, press<br />
OK.<br />
b<br />
c<br />
d<br />
PREFERENCES<br />
3D Setup<br />
REGZA-LINK Setup<br />
Network Setup<br />
Media Renderer Setup<br />
Photo Frame Setup<br />
Teletext<br />
Network Lock<br />
Panel Lock<br />
Auto<br />
Press B or b to highlight Installation, and press OK.<br />
Press C or c to select On, and press OK.<br />
If you want to change the device name as a Renderer,<br />
highlight the Device Name field and press OK. The<br />
Software Keyboard window will appear.<br />
Off<br />
Off<br />
a<br />
b<br />
In the PREFERENCES menu, highlight Media<br />
Renderer Setup and press OK.<br />
Press B or b to highlight Media Renderer, and then<br />
press C or c to select On or Off.<br />
The TV’s DMR device name can be changed. The device name<br />
can be confirmed from the DMC.<br />
a<br />
b<br />
Media Renderer<br />
Device Name Setup<br />
In the PREFERENCES menu, highlight Media<br />
Renderer Setup and press OK.<br />
Press B or b to highlight Device Name Setup, and<br />
press OK.<br />
e<br />
Input the Device Name by using the Software<br />
Keyboard (see page 47). Press the BLUE button.<br />
c<br />
Highlight the Device Name field and press OK. The<br />
Software Keyboard window will appear.<br />
f<br />
NOTE: The Device Name can be up to 127 characters<br />
long.<br />
Highlight Done, and then press OK to save your<br />
setting.<br />
d<br />
Input the Device Name by using the Software<br />
Keyboard (see page 47). Press the BLUE button.<br />
NOTE: The Device Name can be up to 127 characters<br />
long.<br />
g<br />
If you want to change the password, press C or c to<br />
select Yes, and then press OK.<br />
e<br />
Highlight Done, and then press OK to save your<br />
setting.<br />
48