Owner's Manual SSP-600 Surround Processor - Classé Audio
Owner's Manual SSP-600 Surround Processor - Classé Audio
Owner's Manual SSP-600 Surround Processor - Classé Audio

Create successful ePaper yourself
Turn your PDF publications into a flip-book with our unique Google optimized e-Paper software.
• The name of each position can be specified in the same way that sources<br />
are. (See input setup earlier in this section.)<br />
• autocalibration uses the provided microphone to calibrate the system<br />
automatically for optimal performance in each of these four positions.<br />
Simply plug in the microphone to the mic input on the rear panel, place<br />
the microphone at the desired position, and then press auto levels and<br />
auto delays in turn, allowing the <strong>SSP</strong>-<strong>600</strong> to run its tests and establish the<br />
correct settings for you.<br />
• manual levels adjusts the speakers levels manually as you might have<br />
done with other surround processors. A noise sequencer is available to<br />
provide a reference signal for adjustment purposes. Holding a dB SPL<br />
meter at the listening position, at arm’s length, and pointing straight up<br />
at the ceiling, adjust the level of each speaker in turn until it reads 75<br />
dB SPL when the meter is set to “C” weighting and Slow response.<br />
• manual distance adjusts the distances settings manually as you might<br />
have done with other surround processors. Simply measure the distance<br />
with a tape measure or equivalent, and enter the distance into the menu.<br />
The <strong>SSP</strong>-<strong>600</strong> will automatically convert this distance to the appropriate<br />
delay.<br />
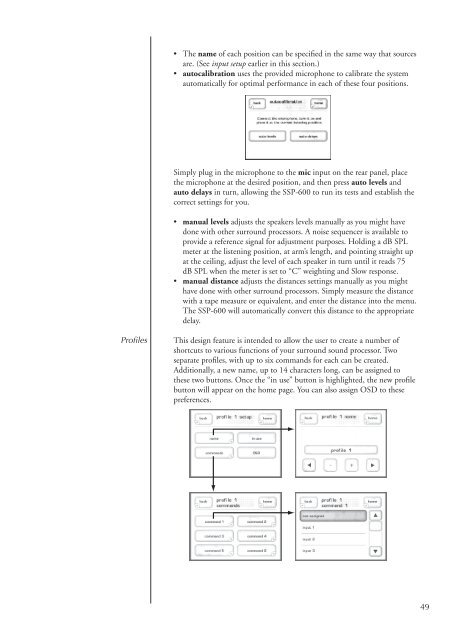
Profiles<br />
This design feature is intended to allow the user to create a number of<br />
shortcuts to various functions of your surround sound processor. Two<br />
separate profiles, with up to six commands for each can be created.<br />
Additionally, a new name, up to 14 characters long, can be assigned to<br />
these two buttons. Once the “in use” button is highlighted, the new profile<br />
button will appear on the home page. You can also assign OSD to these<br />
preferences.<br />
49