Leonardo 250-300 Repair Manual 2004 - Wheels Academy
Leonardo 250-300 Repair Manual 2004 - Wheels Academy
Leonardo 250-300 Repair Manual 2004 - Wheels Academy

You also want an ePaper? Increase the reach of your titles
YUMPU automatically turns print PDFs into web optimized ePapers that Google loves.
LEONARDO <strong>250</strong> - <strong>300</strong><br />
GENERAL INFORMATION<br />
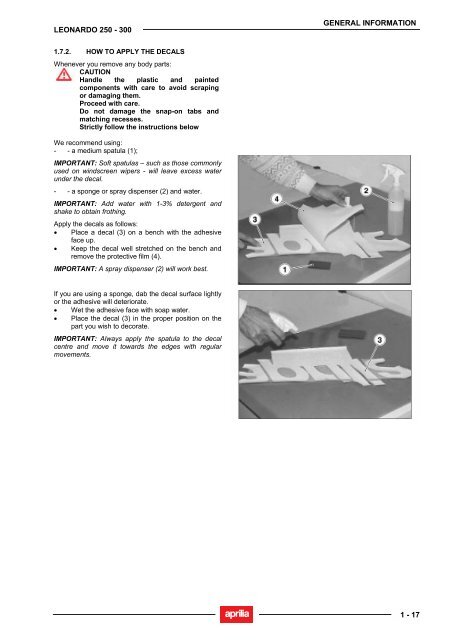
1.7.2. HOW TO APPLY THE DECALS<br />
Whenever you remove any body parts:<br />
CAUTION<br />
Handle the plastic and painted<br />
components with care to avoid scraping<br />
or damaging them.<br />
Proceed with care.<br />
Do not damage the snap-on tabs and<br />
matching recesses.<br />
Strictly follow the instructions below<br />
We recommend using:<br />
- - a medium spatula (1);<br />
IMPORTANT: Soft spatulas – such as those commonly<br />
used on windscreen wipers - will leave excess water<br />
under the decal.<br />
- - a sponge or spray dispenser (2) and water.<br />
IMPORTANT: Add water with 1-3% detergent and<br />
shake to obtain frothing.<br />
Apply the decals as follows:<br />
• Place a decal (3) on a bench with the adhesive<br />
face up.<br />
• Keep the decal well stretched on the bench and<br />
remove the protective film (4).<br />
IMPORTANT: A spray dispenser (2) will work best.<br />
If you are using a sponge, dab the decal surface lightly<br />
or the adhesive will deteriorate.<br />
• Wet the adhesive face with soap water.<br />
• Place the decal (3) in the proper position on the<br />
part you wish to decorate.<br />
IMPORTANT: Always apply the spatula to the decal<br />
centre and move it towards the edges with regular<br />
movements.<br />
1 - 17