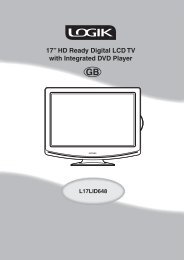
19†HD Ready Digital LCD TV with DVD Player - KnowHow
19†HD Ready Digital LCD TV with DVD Player - KnowHow
19†HD Ready Digital LCD TV with DVD Player - KnowHow

Create successful ePaper yourself
Turn your PDF publications into a flip-book with our unique Google optimized e-Paper software.
To Lock<br />
a. Press the buttons to highlight a channel and then press the BLUE<br />
button.<br />
b. Press the BLUE button again to unlock.<br />
To Move<br />
a. Press the buttons and then press the button to select a channel.<br />
b. Press the buttons to move the selected channel.<br />
c. Press the OK button to confirm.<br />
To Rename<br />
a. Press the<br />
button.<br />
buttons to highlight a channel and then press the OK<br />
b. Key in the character by press the OK button on the remote control.<br />
c. Press the buttons and then press the button to select OK<br />
displayed on the screen when finished.<br />
4. Press the MENU button to save and return back to the previous menu.<br />
5. Press the EXIT button to exit the menu.<br />
Customising the <strong>TV</strong> Settings (D<strong>TV</strong> Mode)<br />
Auto Tuning<br />
Use this to automatically find and store all available channels. This is normally recommended if some channels have been added/<br />
removed by the broadcaster or you have moved house.<br />
1. Press the MENU button and then use the buttons to select the D<strong>TV</strong><br />
menu and then press the button.<br />
2. Press the buttons to select AUTO TUNING and then press the OK<br />
button or the button.<br />
3. The Auto Tuning screen will pop up. Press the buttons to select YES and<br />
then press the OK button to start the auto tuning.<br />
If you stop the tuning before it has finished, the <strong>TV</strong> will report it<br />
as a no signal error. This is normal because all previous channel<br />
memory has been cleared before tuning is carried out.<br />
Logik L19<strong>DVD</strong>P10_B20_IB_100914_Zell.indd 29 14/09/2010 3:03 PM<br />
GB-29<br />
Preparation<br />
Connections<br />
Initial Setup<br />
Using the Features<br />
Using the Features<br />
via USB port<br />
DVR (<strong>Digital</strong><br />
Video Recorder)<br />
Using the <strong>DVD</strong><br />
Features<br />
Hints and Tips, Specification<br />
and Safety Warnings