User's Manual ZA-200 / ZA-250
User's Manual ZA-200 / ZA-250
User's Manual ZA-200 / ZA-250

You also want an ePaper? Increase the reach of your titles
YUMPU automatically turns print PDFs into web optimized ePapers that Google loves.
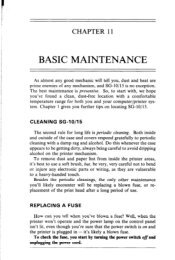
MAINTENANCE ‘<br />
Essentially,yourpcinterisarobustpieceofe@pmen6 butshouldbetreated<br />
witha modicumof camin otderto avoidmalfunctions.For example:<br />
●<br />
●<br />
●<br />
●<br />
●<br />
Keepyourprinterin a “comfortable”environment.Roughlyspeaking,if<br />
youm comfortable,thentheenvironmentis suitableforyourprinter(see<br />
Chapter2).<br />
Do not subjecttheprinterto physicalshocksor excessivevibration.<br />
Avoid over-dusty environments.Dust is the enemy of all p~cision<br />
mechanicaldevices.<br />
Tocleantheextenoroftheprinter,useaclothbaselydampenedwitheither<br />
waterwitha littledetergentor a littlealcohol,butdonotallowanyliquid<br />
to fall insidetheprinter.<br />
Theinteriorof theprintermaybecleanedwithasmallvacuumcleaneror<br />
a compmssed-airaerosol(soldfor this purpose).Whenperformingthis<br />
operation, be sure not to bend or damage any cable connectionsor<br />
electroniccomponents.<br />
REPLACINGTHE PRINTHEAD<br />
Thisisnotajob whichyouwillneedtodoveryoften.Theprintheadhasbeen<br />
designedto last for about100milliondraftcharacters.In nonnideveryday<br />
use,thiswilltmnslateto yeas oflife. However,if theprintqualityis faint,<br />
evenafteryouhavechangedtheribbonoryouhaveadjustedthegapbetween<br />
the print head and the platen (see Chapter4), the print head may need<br />
replacement.<br />
Onlyuse a replacementprintheadas mmmmendedby yoursupplier.<br />
1. Turn OFFthe printer,andunplugthepowercml.<br />
2. OPenthe frontcover,and ~move the ribboncartridge.<br />
3. Iftheprinterhasbeeninoperationimmediatelybefomthisoperation,the<br />
print head will be hot. Allow time for the print head to cool before<br />
attemptingto workon it.<br />
4. Unsmw the two scnewsthathold the printhead in placeand set them<br />
aside.<br />
5. Disengagetheconnector,thenremovetheprinthead.<br />
6. Placethenewprintheadon its support,seatingitonthe two pins.<br />
135