AZ-225 Install Manual
AZ-225 Install Manual
AZ-225 Install Manual

Create successful ePaper yourself
Turn your PDF publications into a flip-book with our unique Google optimized e-Paper software.
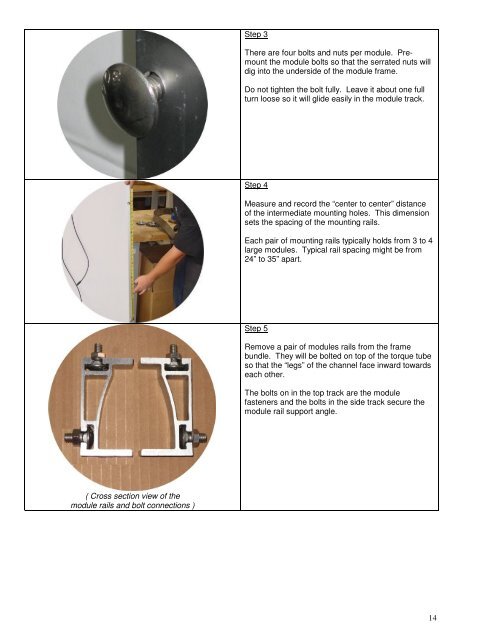
Step 3<br />
There are four bolts and nuts per module. Premount<br />
the module bolts so that the serrated nuts will<br />
dig into the underside of the module frame.<br />
Do not tighten the bolt fully. Leave it about one full<br />
turn loose so it will glide easily in the module track.<br />
Step 4<br />
Measure and record the “center to center” distance<br />
of the intermediate mounting holes. This dimension<br />
sets the spacing of the mounting rails.<br />
Each pair of mounting rails typically holds from 3 to 4<br />
large modules. Typical rail spacing might be from<br />
24” to 35” apart.<br />
Step 5<br />
Remove a pair of modules rails from the frame<br />
bundle. They will be bolted on top of the torque tube<br />
so that the “legs” of the channel face inward towards<br />
each other.<br />
The bolts on in the top track are the module<br />
fasteners and the bolts in the side track secure the<br />
module rail support angle.<br />
( Cross section view of the<br />
module rails and bolt connections )<br />
14