AZ-225 Install Manual
AZ-225 Install Manual
AZ-225 Install Manual

You also want an ePaper? Increase the reach of your titles
YUMPU automatically turns print PDFs into web optimized ePapers that Google loves.
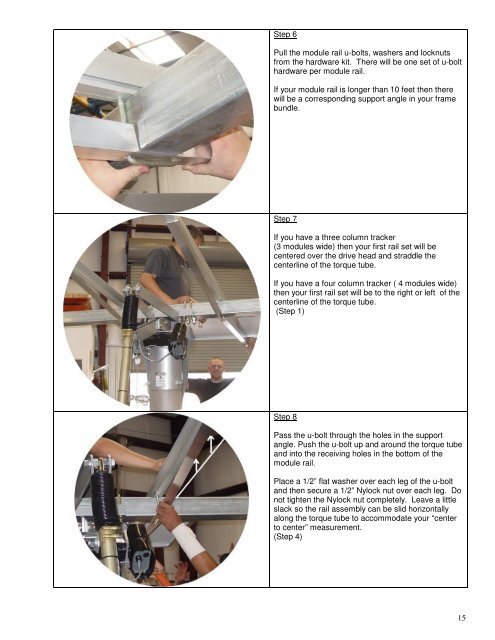
Step 6<br />
Pull the module rail u-bolts, washers and locknuts<br />
from the hardware kit. There will be one set of u-bolt<br />
hardware per module rail.<br />
If your module rail is longer than 10 feet then there<br />
will be a corresponding support angle in your frame<br />
bundle.<br />
Step 7<br />
If you have a three column tracker<br />
(3 modules wide) then your first rail set will be<br />
centered over the drive head and straddle the<br />
centerline of the torque tube.<br />
If you have a four column tracker ( 4 modules wide)<br />
then your first rail set will be to the right or left of the<br />
centerline of the torque tube.<br />
(Step 1)<br />
Step 8<br />
Pass the u-bolt through the holes in the support<br />
angle. Push the u-bolt up and around the torque tube<br />
and into the receiving holes in the bottom of the<br />
module rail.<br />
Place a 1/2” flat washer over each leg of the u-bolt<br />
and then secure a 1/2” Nylock nut over each leg. Do<br />
not tighten the Nylock nut completely. Leave a little<br />
slack so the rail assembly can be slid horizontally<br />
along the torque tube to accommodate your “center<br />
to center” measurement.<br />
(Step 4)<br />
15