4.7 Getting started - WindSim
4.7 Getting started - WindSim
4.7 Getting started - WindSim

Create successful ePaper yourself
Turn your PDF publications into a flip-book with our unique Google optimized e-Paper software.
Demo: Hundhammerfjellet project<br />
11<br />
Demo: Hundhammerfjellet project<br />
In the present demo we look at the site of Hundhammerfjellet, located on the coast in the mid<br />
part of Norway.<br />
<strong>WindSim</strong> contains six modules. A complete project passes through all the modules as you<br />
are going to do in the present demo.<br />
Open <strong>WindSim</strong> and start a new project by choosing: File > New > Project.<br />
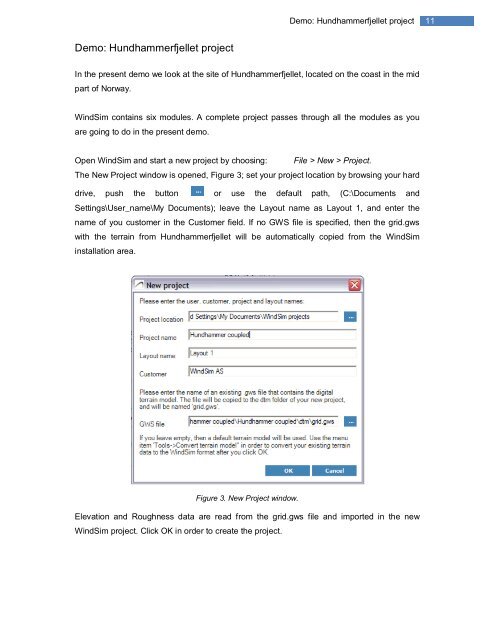
The New Project window is opened, Figure 3; set your project location by browsing your hard<br />
drive, push the button or use the default path, (C:\Documents and<br />
Settings\User_name\My Documents); leave the Layout name as Layout 1, and enter the<br />
name of you customer in the Customer field. If no GWS file is specified, then the grid.gws<br />
with the terrain from Hundhammerfjellet will be automatically copied from the <strong>WindSim</strong><br />
installation area.<br />
Figure 3. New Project window.<br />
Elevation and Roughness data are read from the grid.gws file and imported in the new<br />
<strong>WindSim</strong> project. Click OK in order to create the project.