Create successful ePaper yourself
Turn your PDF publications into a flip-book with our unique Google optimized e-Paper software.
<strong>CLP</strong>-<strong>150</strong>: Keyboard Stand Assembly<br />
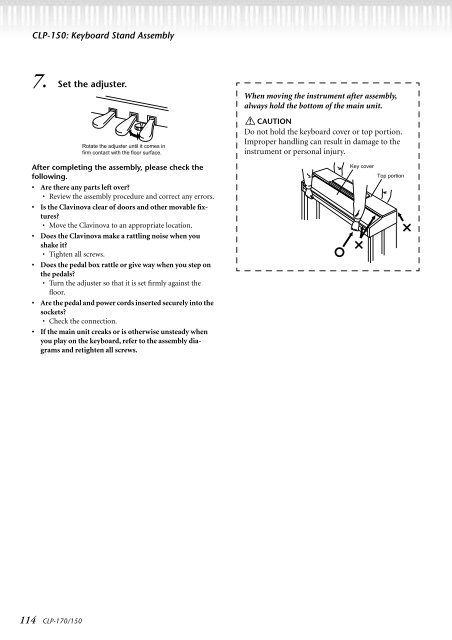
7. Set the adjuster.<br />
After completing the assembly, please check the<br />
following.<br />
• Are there any parts left over?<br />
• Review the assembly procedure and correct any errors.<br />
• Is the Clavinova clear of doors and other movable fixtures?<br />
• Move the Clavinova to an appropriate location.<br />
• Does the Clavinova make a rattling noise when you<br />
shake it?<br />
• Tighten all screws.<br />
• Does the pedal box rattle or give way when you step on<br />
the pedals?<br />
• Turn the adjuster so that it is set firmly against the<br />
floor.<br />
• Are the pedal and power cords inserted securely into the<br />
sockets?<br />
• Check the connection.<br />
• If the main unit creaks or is otherwise unsteady when<br />
you play on the keyboard, refer to the assembly diagrams<br />
and retighten all screws.<br />
114 <strong>CLP</strong>-<strong>170</strong>/<strong>150</strong><br />
Rotate the adjuster until it comes in<br />
firm contact with the floor surface.<br />
When moving the instrument after assembly,<br />
always hold the bottom of the main unit.<br />
CAUTION<br />
Do not hold the keyboard cover or top portion.<br />
Improper handling can result in damage to the<br />
instrument or personal injury.<br />
Key cover<br />
Top portion














![Premere il pulsante [SONG] - Yamaha](https://img.yumpu.com/50419553/1/184x260/premere-il-pulsante-song-yamaha.jpg?quality=85)
