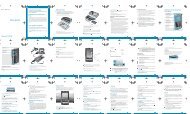
T-Mobile SGH-T869 Galaxy Tab 7.0 Plus User ... - Cell Phones Etc.
T-Mobile SGH-T869 Galaxy Tab 7.0 Plus User ... - Cell Phones Etc.
T-Mobile SGH-T869 Galaxy Tab 7.0 Plus User ... - Cell Phones Etc.

You also want an ePaper? Increase the reach of your titles
YUMPU automatically turns print PDFs into web optimized ePapers that Google loves.
Google Search<br />
Search the internet, and your device, using the Google search<br />
engine.<br />
Tip: The Google Search widget appears on a Home screen by default. For<br />
information about displaying widgets on the Home screen, see “Adding<br />
Widgets to a current screen” on page 37.<br />
148<br />
1. From a Home screen, tap (Google).<br />
– or –<br />
From a Home screen, tap (Apps) ➔<br />
(Google Search).<br />
2. Use the keypad to enter search criteria to display matching<br />
searches.<br />
Suggestions display below the text entry area.<br />
3. Tap a suggestion to search for that term.<br />
– or –<br />
Tap Go to start the search.<br />
A browser window displays the search results.<br />
Latitude<br />
With Google Latitude, you can see the location of all of your<br />
friends on a map or on a list. You can also share or hide your<br />
location.<br />
You must first set up your tablet to use wireless networks to help<br />
pinpoint your location. Also, Latitude works best when Wi-Fi is<br />
enabled.<br />
Important!: For best results, it is recommended that you enable all of your<br />
location services. For more information, refer to “Location and<br />
Security” on page 185.<br />
Note: Although you do not have to enable location services in order to use<br />
Latitude, it is recommended for best accuracy.<br />
1. From a Home screen, tap (Apps) ➔ (Settings)<br />
➔ Location and security ➔ Use wireless networks.<br />
A green check mark indicates the feature is enabled.<br />
2. Log on to your Google account.<br />
To create a Google account or set up your Google account<br />
on your device use Accounts and sync settings. For more<br />
information, refer to “Accounts and Sync” on page 192.