
You also want an ePaper? Increase the reach of your titles
YUMPU automatically turns print PDFs into web optimized ePapers that Google loves.
Installation and Operation of Sign Cutting Plotter 2-3<br />
Jaguar II User Manual<br />
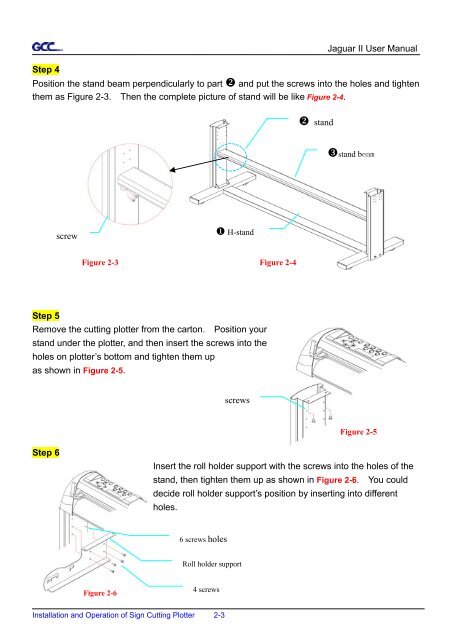
Step 4<br />
Position the stand beam perpendicularly to part � and put the screws into the holes and tighten<br />
them as Figure 2-3. Then the complete picture of stand will be like Figure 2-4.<br />
Step 5<br />
Remove the cutting plotter from the carton. Position your<br />
stand under the plotter, and then insert the screws into the<br />
holes on plotter’s bottom and tighten them up<br />
as shown in Figure 2-5.<br />
Step 6<br />
screw<br />
Figure 2-3<br />
Figure 2-6<br />
� H-stand<br />
screws<br />
Figure 2-4<br />
� stand<br />
�stand beam<br />
Figure 2-5<br />
Insert the roll holder support with the screws into the holes of the<br />
stand, then tighten them up as shown in Figure 2-6. You could<br />
decide roll holder support’s position by inserting into different<br />
holes.<br />
6 screws holes<br />
Roll holder support<br />
4 screws