
You also want an ePaper? Increase the reach of your titles
YUMPU automatically turns print PDFs into web optimized ePapers that Google loves.
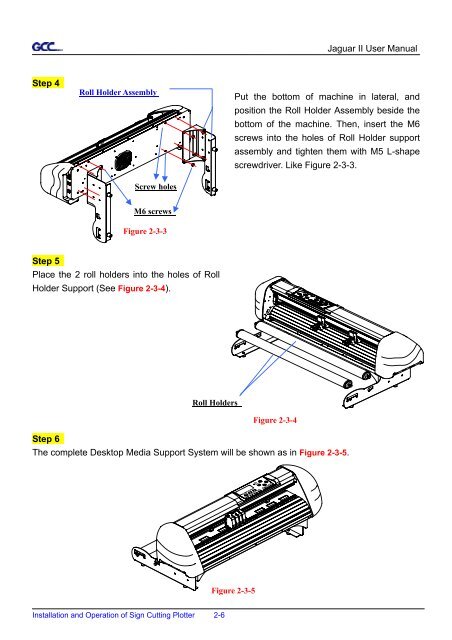
Step 4<br />
Roll Holder Assembly<br />
Screw holes<br />
M6 screws<br />
Figure 2-3-3<br />
Step 5<br />
Place the 2 roll holders into the holes of Roll<br />
Holder Support (See Figure 2-3-4).<br />
Roll Holders<br />
Installation and Operation of Sign Cutting Plotter 2-6<br />
Jaguar II User Manual<br />
Put the bottom of machine in lateral, and<br />
position the Roll Holder Assembly beside the<br />
bottom of the machine. Then, insert the M6<br />
screws into the holes of Roll Holder support<br />
assembly and tighten them with M5 L-shape<br />
screwdriver. Like Figure 2-3-3.<br />
Step 6<br />
The complete Desktop Media Support System will be shown as in Figure 2-3-5.<br />
Figure 2-3-5<br />
Figure 2-3-4