
You also want an ePaper? Increase the reach of your titles
YUMPU automatically turns print PDFs into web optimized ePapers that Google loves.
4. Making Connections<br />
Jaguar II User Manual<br />
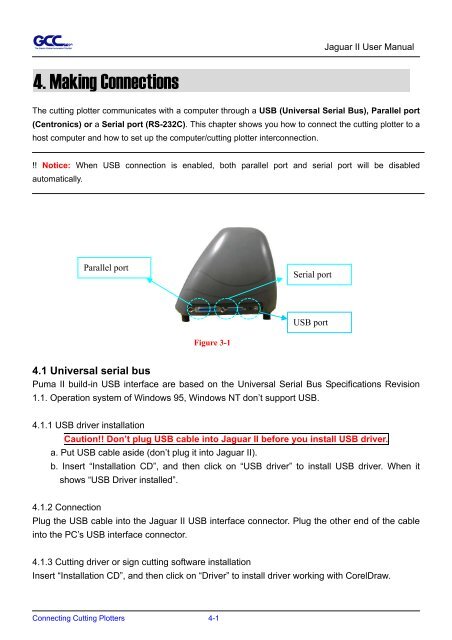
The cutting plotter communicates with a computer through a USB (Universal Serial Bus), Parallel port<br />
(Centronics) or a Serial port (RS-232C). This chapter shows you how to connect the cutting plotter to a<br />
host computer and how to set up the computer/cutting plotter interconnection.<br />
!! Notice: When USB connection is enabled, both parallel port and serial port will be disabled<br />
automatically.<br />
Parallel port<br />
Figure 3-1<br />
Serial port<br />
USB port<br />
4.1 Universal serial bus<br />
Puma II build-in USB interface are based on the Universal Serial Bus Specifications Revision<br />
1.1. Operation system of Windows 95, Windows NT don’t support USB.<br />
4.1.1 USB driver installation<br />
Caution!! Don’t plug USB cable into Jaguar II before you install USB driver.<br />
a. Put USB cable aside (don’t plug it into Jaguar II).<br />
b. Insert “Installation CD”, and then click on “USB driver” to install USB driver. When it<br />
shows “USB Driver installed”.<br />
4.1.2 Connection<br />
Plug the USB cable into the Jaguar II USB interface connector. Plug the other end of the cable<br />
into the PC’s USB interface connector.<br />
4.1.3 Cutting driver or sign cutting software installation<br />
Insert “Installation CD”, and then click on “Driver” to install driver working with CorelDraw.<br />
Connecting Cutting Plotters 4-1