


You also want an ePaper? Increase the reach of your titles
YUMPU automatically turns print PDFs into web optimized ePapers that Google loves.
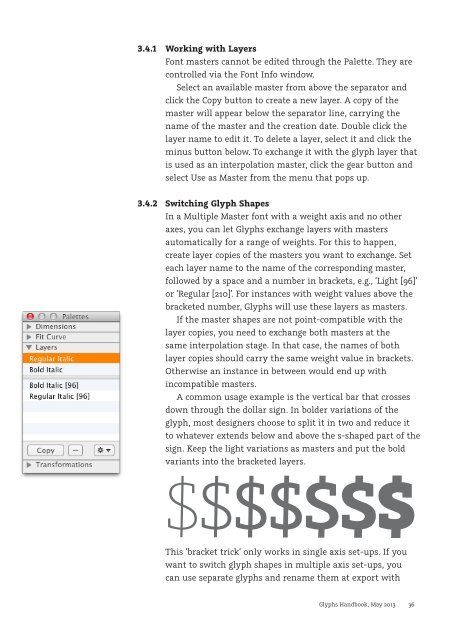
3.4.1 Working with Layers<br />
Font masters cannot be edited through the Palette. They are<br />
controlled via the Font Info window.<br />
Select an available master from above the separator and<br />
click the Copy button to create a new layer. A copy of the<br />
master will appear below the separator line, carrying the<br />
name of the master and the creation date. Double click the<br />
layer name to edit it. To delete a layer, select it and click the<br />
minus button below. To exchange it with the glyph layer that<br />
is used as an interpolation master, click the gear button and<br />
select Use as Master from the menu that pops up.<br />
3.4.2 Switching Glyph Shapes<br />
In a Multiple Master font with a weight axis and no other<br />
axes, you can let <strong>Glyphs</strong> exchange layers with masters<br />
automatically for a range of weights. For this to happen,<br />
create layer copies of the masters you want to exchange. Set<br />
each layer name to the name of the corresponding master,<br />
followed by a space and a number in brackets, e.g., ‘Light [96]’<br />
or ‘Regular [210]’. For instances with weight values above the<br />
bracketed number, <strong>Glyphs</strong> will use these layers as masters.<br />
If the master shapes are not point-compatible with the<br />
layer copies, you need to exchange both masters at the<br />
same interpolation stage. In that case, the names of both<br />
layer copies should carry the same weight value in brackets.<br />
Otherwise an instance in between would end up with<br />
incompatible masters.<br />
A common usage example is the vertical bar that crosses<br />
down through the dollar sign. In bolder variations of the<br />
glyph, most designers choose to split it in two and reduce it<br />
to whatever extends below and above the s-shaped part of the<br />
sign. Keep the light variations as masters and put the bold<br />
variants into the bracketed layers.<br />
$$$$$$$<br />
This ‘bracket trick’ only works in single axis set-ups. If you<br />
want to switch glyph shapes in multiple axis set-ups, you<br />
can use separate glyphs and rename them at export with<br />
<strong>Glyphs</strong> <strong>Handbook</strong>, May <strong>2013</strong> 36