

The Best of Wedding Photography.pdf - Free
The Best of Wedding Photography.pdf - Free
The Best of Wedding Photography.pdf - Free

You also want an ePaper? Increase the reach of your titles
YUMPU automatically turns print PDFs into web optimized ePapers that Google loves.
take up more room on media storage cards and they take<br />
longer to write to the cards. As a result, many wedding<br />
photographers find it more practical to shoot JPEGs and<br />
perfect the color balance when creating the exposure,<br />
much like shooting conventional transparency film with its<br />
unforgiving latitude. This topic is covered in greater detail<br />
below.<br />
A system that many pros follow is to take a custom<br />
white balance <strong>of</strong> a scene where they are unsure <strong>of</strong> the lighting<br />
mix. By selecting a white area in the scene and neutralizing<br />
it with a custom white-balance setting, you can<br />
be assured <strong>of</strong> an accurate color rendition.<br />
Others swear by a device known as the Wallace Expo-<br />
Disc (www.expodisc.com), which attaches to the the lens<br />
like a filter. You take a white-balance reading with the disc<br />
in place and the lens pointed at your scene. It is highly accurate<br />
in most situations and can also be used for exposure<br />
readings.<br />
SHARPENING AND CONTRAST<br />
Image sharpening should be set to <strong>of</strong>f or minimal. Sharpening<br />
is usually the last step before output and should be<br />
done in Photoshop where there is optimum control. Contrast<br />
should also be adjusted to the lowest setting. According<br />
to California wedding photographer Becker, “It’s<br />
always easy to add contrast later, but more difficult to take<br />
away.”<br />
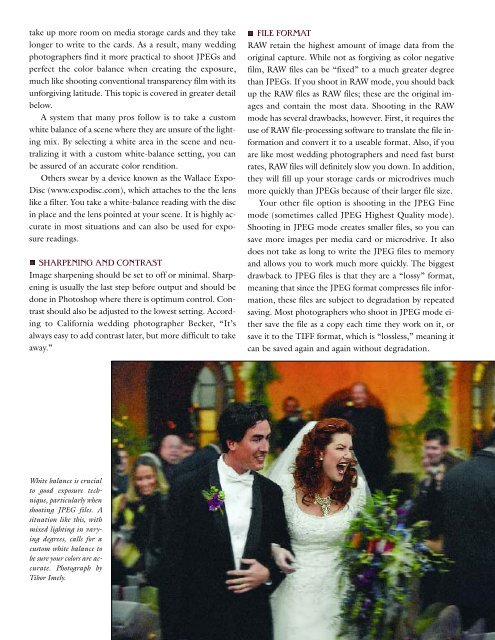
White balance is crucial<br />
to good exposure technique,<br />
particularly when<br />
shooting JPEG files. A<br />
situation like this, with<br />
mixed lighting in varying<br />
degrees, calls for a<br />
custom white balance to<br />
be sure your colors are accurate.<br />
Photograph by<br />
Tibor Imely.<br />
FILE FORMAT<br />
RAW retain the highest amount <strong>of</strong> image data from the<br />
original capture. While not as forgiving as color negative<br />
film, RAW files can be “fixed” to a much greater degree<br />
than JPEGs. If you shoot in RAW mode, you should back<br />
up the RAW files as RAW files; these are the original images<br />
and contain the most data. Shooting in the RAW<br />
mode has several drawbacks, however. First, it requires the<br />
use <strong>of</strong> RAW file-processing s<strong>of</strong>tware to translate the file information<br />
and convert it to a useable format. Also, if you<br />
are like most wedding photographers and need fast burst<br />
rates, RAW files will definitely slow you down. In addition,<br />
they will fill up your storage cards or microdrives much<br />
more quickly than JPEGs because <strong>of</strong> their larger file size.<br />
Your other file option is shooting in the JPEG Fine<br />
mode (sometimes called JPEG Highest Quality mode).<br />
Shooting in JPEG mode creates smaller files, so you can<br />
save more images per media card or microdrive. It also<br />
does not take as long to write the JPEG files to memory<br />
and allows you to work much more quickly. <strong>The</strong> biggest<br />
drawback to JPEG files is that they are a “lossy” format,<br />
meaning that since the JPEG format compresses file information,<br />
these files are subject to degradation by repeated<br />
saving. Most photographers who shoot in JPEG mode either<br />
save the file as a copy each time they work on it, or<br />
save it to the TIFF format, which is “lossless,” meaning it<br />
can be saved again and again without degradation.


