NewTom VG User Manual rev 4.0 - Image Works
NewTom VG User Manual rev 4.0 - Image Works
NewTom VG User Manual rev 4.0 - Image Works

You also want an ePaper? Increase the reach of your titles
YUMPU automatically turns print PDFs into web optimized ePapers that Google loves.
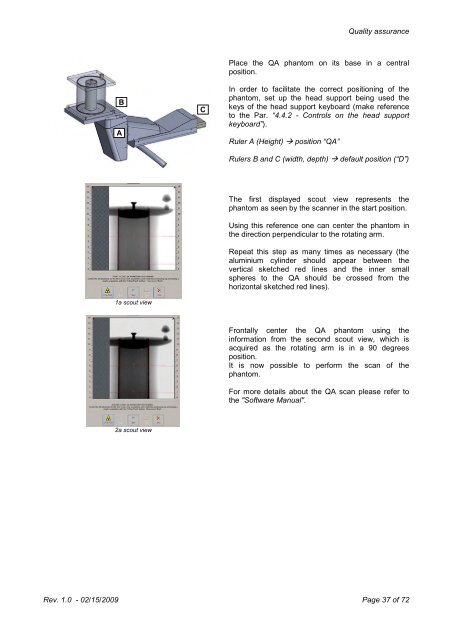
Quality assurance<br />
B<br />
A<br />
C<br />
Place the QA phantom on its base in a central<br />
position.<br />
In order to facilitate the correct positioning of the<br />
phantom, set up the head support being used the<br />
keys of the head support keyboard (make reference<br />
to the Par. “4.4.2 - Controls on the head support<br />
keyboard”).<br />
Ruler A (Height) position “QA”<br />
Rulers B and C (width, depth) default position (“D”)<br />
1a scout view<br />
The first displayed scout view represents the<br />
phantom as seen by the scanner in the start position.<br />
Using this reference one can center the phantom in<br />
the direction perpendicular to the rotating arm.<br />
Repeat this step as many times as necessary (the<br />
aluminium cylinder should appear between the<br />
vertical sketched red lines and the inner small<br />
spheres to the QA should be crossed from the<br />
horizontal sketched red lines).<br />
Frontally center the QA phantom using the<br />
information from the second scout view, which is<br />
acquired as the rotating arm is in a 90 degrees<br />
position.<br />
It is now possible to perform the scan of the<br />
phantom.<br />
For more details about the QA scan please refer to<br />
the "Software <strong>Manual</strong>".<br />
2a scout view<br />
Rev. 1.0 - 02/15/2009 Page 37 of 72