MASTER_40_Salesware_Installation_Guide
MASTER_40_Salesware_Installation_Guide
MASTER_40_Salesware_Installation_Guide

Create successful ePaper yourself
Turn your PDF publications into a flip-book with our unique Google optimized e-Paper software.
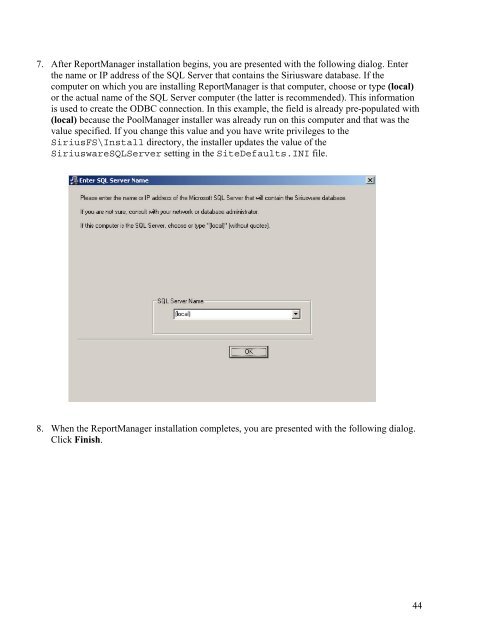
7. After ReportManager installation begins, you are presented with the following dialog. Enter<br />
the name or IP address of the SQL Server that contains the Siriusware database. If the<br />
computer on which you are installing ReportManager is that computer, choose or type (local)<br />
or the actual name of the SQL Server computer (the latter is recommended). This information<br />
is used to create the ODBC connection. In this example, the field is already pre-populated with<br />
(local) because the PoolManager installer was already run on this computer and that was the<br />
value specified. If you change this value and you have write privileges to the<br />
SiriusFS\Install directory, the installer updates the value of the<br />
SiriuswareSQLServer setting in the SiteDefaults.INI file.<br />
8. When the ReportManager installation completes, you are presented with the following dialog.<br />
Click Finish.<br />
44