V25 Getting Started - BobCAD-CAM
V25 Getting Started - BobCAD-CAM
V25 Getting Started - BobCAD-CAM

You also want an ePaper? Increase the reach of your titles
YUMPU automatically turns print PDFs into web optimized ePapers that Google loves.
<strong>BobCAD</strong>‐<strong>CAM</strong> Version 25 <strong>Getting</strong> <strong>Started</strong> Guide<br />
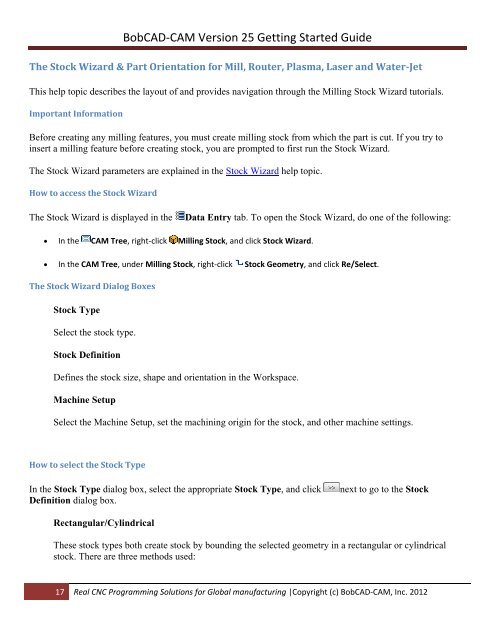
The Stock Wizard & Part Orientation for Mill, Router, Plasma, Laser and Water‐Jet<br />
This help topic describes the layout of and provides navigation through the Milling Stock Wizard tutorials.<br />
Important Information<br />
Before creating any milling features, you must create milling stock from which the part is cut. If you try to<br />
insert a milling feature before creating stock, you are prompted to first run the Stock Wizard.<br />
The Stock Wizard parameters are explained in the Stock Wizard help topic.<br />
How to access the Stock Wizard<br />
The Stock Wizard is displayed in the<br />
Data Entry tab. To open the Stock Wizard, do one of the following:<br />
In the <strong>CAM</strong> Tree, right‐click Milling Stock, and click Stock Wizard.<br />
In the <strong>CAM</strong> Tree, under Milling Stock, right‐click Stock Geometry, and click Re/Select.<br />
The Stock Wizard Dialog Boxes<br />
Stock Type<br />
Select the stock type.<br />
Stock Definition<br />
Defines the stock size, shape and orientation in the Workspace.<br />
Machine Setup<br />
Select the Machine Setup, set the machining origin for the stock, and other machine settings.<br />
How to select the Stock Type<br />
In the Stock Type dialog box, select the appropriate Stock Type, and click<br />
Definition dialog box.<br />
next to go to the Stock<br />
Rectangular/Cylindrical<br />
These stock types both create stock by bounding the selected geometry in a rectangular or cylindrical<br />
stock. There are three methods used:<br />
17 Real CNC Programming Solutions for Global manufacturing |Copyright (c) <strong>BobCAD</strong>‐<strong>CAM</strong>, Inc. 2012