
You also want an ePaper? Increase the reach of your titles
YUMPU automatically turns print PDFs into web optimized ePapers that Google loves.
Service Access: (Pre-pour and After-pour methods)<br />
PRODUCT MANUAL<br />
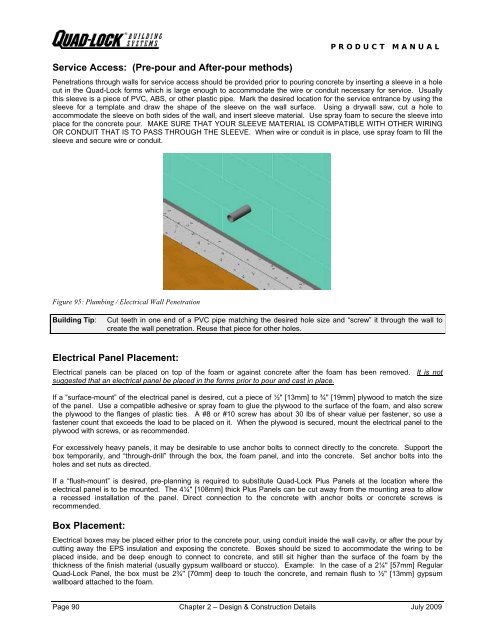
Penetrations through walls for service access should be provided prior to pouring concrete by inserting a sleeve in a hole<br />
cut in the <strong>Quad</strong>-<strong>Lock</strong> forms which is large enough to accommodate the wire or conduit necessary for service. Usually<br />
this sleeve is a piece of PVC, ABS, or other plastic pipe. Mark the desired location for the service entrance by using the<br />
sleeve for a template and draw the shape of the sleeve on the wall surface. Using a drywall saw, cut a hole to<br />
accommodate the sleeve on both sides of the wall, and insert sleeve material. Use spray foam to secure the sleeve into<br />
place for the concrete pour. MAKE SURE THAT YOUR SLEEVE MATERIAL IS COMPATIBLE WITH OTHER WIRING<br />
OR CONDUIT THAT IS TO PASS THROUGH THE SLEEVE. When wire or conduit is in place, use spray foam to fill the<br />
sleeve and secure wire or conduit.<br />
Figure 95: Plumbing / Electrical Wall Penetration<br />
<strong>Building</strong> Tip: Cut teeth in one end of a PVC pipe matching the desired hole size and “screw” it through the wall to<br />
create the wall penetration. Reuse that piece for other holes.<br />
Electrical Panel Placement:<br />
Electrical panels can be placed on top of the foam or against concrete after the foam has been removed. It is not<br />
suggested that an electrical panel be placed in the forms prior to pour and cast in place.<br />
If a “surface-mount” of the electrical panel is desired, cut a piece of ½" [13mm] to ¾" [19mm] plywood to match the size<br />
of the panel. Use a compatible adhesive or spray foam to glue the plywood to the surface of the foam, and also screw<br />
the plywood to the flanges of plastic ties. A #8 or #10 screw has about 30 lbs of shear value per fastener, so use a<br />
fastener count that exceeds the load to be placed on it. When the plywood is secured, mount the electrical panel to the<br />
plywood with screws, or as recommended.<br />
For excessively heavy panels, it may be desirable to use anchor bolts to connect directly to the concrete. Support the<br />
box temporarily, and “through-drill” through the box, the foam panel, and into the concrete. Set anchor bolts into the<br />
holes and set nuts as directed.<br />
If a “flush-mount” is desired, pre-planning is required to substitute <strong>Quad</strong>-<strong>Lock</strong> Plus Panels at the location where the<br />
electrical panel is to be mounted. The 4¼" [108mm] thick Plus Panels can be cut away from the mounting area to allow<br />
a recessed installation of the panel. Direct connection to the concrete with anchor bolts or concrete screws is<br />
recommended.<br />
Box Placement:<br />
Electrical boxes may be placed either prior to the concrete pour, using conduit inside the wall cavity, or after the pour by<br />
cutting away the EPS insulation and exposing the concrete. Boxes should be sized to accommodate the wiring to be<br />
placed inside, and be deep enough to connect to concrete, and still sit higher than the surface of the foam by the<br />
thickness of the finish material (usually gypsum wallboard or stucco). Example: In the case of a 2¼" [57mm] Regular<br />
<strong>Quad</strong>-<strong>Lock</strong> Panel, the box must be 2¾" [70mm] deep to touch the concrete, and remain flush to ½" [13mm] gypsum<br />
wallboard attached to the foam.<br />
Page 90 Chapter 2 – Design & Construction Details July 2009