Aspire PCPro/WebPro Installation Manual - Support - NEC Unified ...
Aspire PCPro/WebPro Installation Manual - Support - NEC Unified ...
Aspire PCPro/WebPro Installation Manual - Support - NEC Unified ...
- No tags were found...

You also want an ePaper? Increase the reach of your titles
YUMPU automatically turns print PDFs into web optimized ePapers that Google loves.
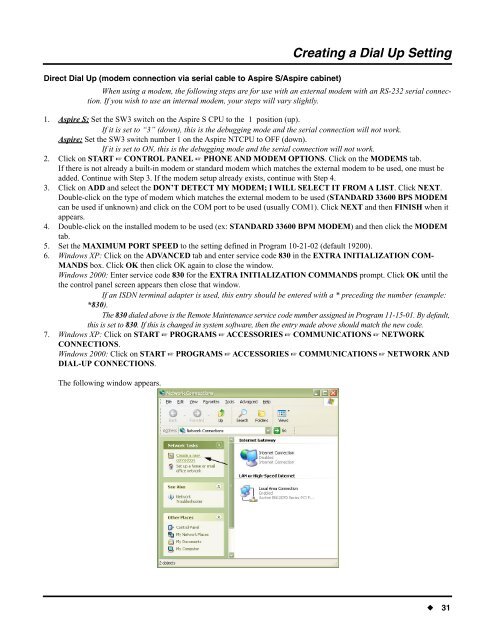
Creating a Dial Up SettingDirect Dial Up (modem connection via serial cable to <strong>Aspire</strong> S/<strong>Aspire</strong> cabinet)When using a modem, the following steps are for use with an external modem with an RS-232 serial connection.If you wish to use an internal modem, your steps will vary slightly.1. <strong>Aspire</strong> S: Set the SW3 switch on the <strong>Aspire</strong> S CPU to the 1 position (up).If it is set to “3” (down), this is the debugging mode and the serial connection will not work.<strong>Aspire</strong>: Set the SW3 switch number 1 on the <strong>Aspire</strong> NTCPU to OFF (down).If it is set to ON, this is the debugging mode and the serial connection will not work.2. Click on START ☞ CONTROL PANEL ☞ PHONE AND MODEM OPTIONS. Click on the MODEMS tab.If there is not already a built-in modem or standard modem which matches the external modem to be used, one must beadded. Continue with Step 3. If the modem setup already exists, continue with Step 4.3. Click on ADD and select the DON’T DETECT MY MODEM; I WILL SELECT IT FROM A LIST. Click NEXT.Double-click on the type of modem which matches the external modem to be used (STANDARD 33600 BPS MODEMcan be used if unknown) and click on the COM port to be used (usually COM1). Click NEXT and then FINISH when itappears.4. Double-click on the installed modem to be used (ex: STANDARD 33600 BPM MODEM) and then click the MODEMtab.5. Set the MAXIMUM PORT SPEED to the setting defined in Program 10-21-02 (default 19200).6. Windows XP: Click on the ADVANCED tab and enter service code 830 in the EXTRA INITIALIZATION COM-MANDS box. Click OK then click OK again to close the window.Windows 2000: Enter service code 830 for the EXTRA INITIALIZATION COMMANDS prompt. Click OK until thethe control panel screen appears then close that window.If an ISDN terminal adapter is used, this entry should be entered with a * preceding the number (example:*830).The 830 dialed above is the Remote Maintenance service code number assigned in Program 11-15-01. By default,this is set to 830. If this is changed in system software, then the entry made above should match the new code.7. Windows XP: Click on START ☞ PROGRAMS ☞ ACCESSORIES ☞ COMMUNICATIONS ☞ NETWORKCON<strong>NEC</strong>TIONS.Windows 2000: Click on START ☞ PROGRAMS ☞ ACCESSORIES ☞ COMMUNICATIONS ☞ NETWORK ANDDIAL-UP CON<strong>NEC</strong>TIONS.The following window appears.◆ 31