RAINFOR GEM Intensive Plots Manual (pdf) - University of Oxford
RAINFOR GEM Intensive Plots Manual (pdf) - University of Oxford
RAINFOR GEM Intensive Plots Manual (pdf) - University of Oxford
- No tags were found...

Create successful ePaper yourself
Turn your PDF publications into a flip-book with our unique Google optimized e-Paper software.
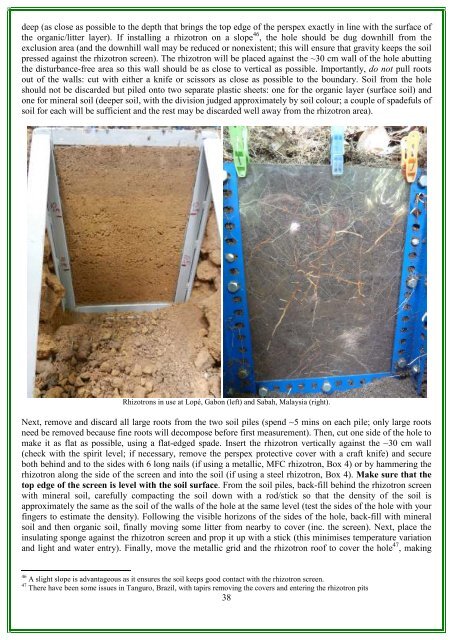
deep (as close as possible to the depth that brings the top edge <strong>of</strong> the perspex exactly in line with the surface <strong>of</strong>the organic/litter layer). If installing a rhizotron on a slope 46 , the hole should be dug downhill from theexclusion area (and the downhill wall may be reduced or nonexistent; this will ensure that gravity keeps the soilpressed against the rhizotron screen). The rhizotron will be placed against the ~30 cm wall <strong>of</strong> the hole abuttingthe disturbance-free area so this wall should be as close to vertical as possible. Importantly, do not pull rootsout <strong>of</strong> the walls: cut with either a knife or scissors as close as possible to the boundary. Soil from the holeshould not be discarded but piled onto two separate plastic sheets: one for the organic layer (surface soil) andone for mineral soil (deeper soil, with the division judged approximately by soil colour; a couple <strong>of</strong> spadefuls <strong>of</strong>soil for each will be sufficient and the rest may be discarded well away from the rhizotron area).Rhizotrons in use at Lopé, Gabon (left) and Sabah, Malaysia (right).Next, remove and discard all large roots from the two soil piles (spend ~5 mins on each pile; only large rootsneed be removed because fine roots will decompose before first measurement). Then, cut one side <strong>of</strong> the hole tomake it as flat as possible, using a flat-edged spade. Insert the rhizotron vertically against the ~30 cm wall(check with the spirit level; if necessary, remove the perspex protective cover with a craft knife) and secureboth behind and to the sides with 6 long nails (if using a metallic, MFC rhizotron, Box 4) or by hammering therhizotron along the side <strong>of</strong> the screen and into the soil (if using a steel rhizotron, Box 4). Make sure that thetop edge <strong>of</strong> the screen is level with the soil surface. From the soil piles, back-fill behind the rhizotron screenwith mineral soil, carefully compacting the soil down with a rod/stick so that the density <strong>of</strong> the soil isapproximately the same as the soil <strong>of</strong> the walls <strong>of</strong> the hole at the same level (test the sides <strong>of</strong> the hole with yourfingers to estimate the density). Following the visible horizons <strong>of</strong> the sides <strong>of</strong> the hole, back-fill with mineralsoil and then organic soil, finally moving some litter from nearby to cover (inc. the screen). Next, place theinsulating sponge against the rhizotron screen and prop it up with a stick (this minimises temperature variationand light and water entry). Finally, move the metallic grid and the rhizotron ro<strong>of</strong> to cover the hole 47 , making46 A slight slope is advantageous as it ensures the soil keeps good contact with the rhizotron screen.47 There have been some issues in Tanguro, Brazil, with tapirs removing the covers and entering the rhizotron pits38