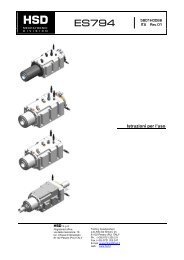
ES721 ISO40 7 kW NL - HSD
ES721 ISO40 7 kW NL - HSD
ES721 ISO40 7 kW NL - HSD

You also want an ePaper? Increase the reach of your titles
YUMPU automatically turns print PDFs into web optimized ePapers that Google loves.
<strong>HSD</strong><br />
12.1.2 Replacement and adjustment of the sensor unit<br />
i<br />
For the replacement and adjustment of the sensors shown in this paragraph (and those<br />
to follow), always refer to Image 12-1; Image 12-2; Image 12-3 of the previous<br />
paragraph.<br />
1. Remove screw “9” that blocks the bracket or block “6” of the sensor unit “8” to be replaced;<br />
2. unthread the faulty sensor unit from its seat, and disconnect its electrical connector “1”;<br />
3. connect the electrical connector of the new sensor unit to the correspondingly numbered<br />
connector of the spindle;<br />
4. check the functioning of the new sensor by bringing it into contact with a metallic mass;<br />
5. Insert the new sensor unit in the empty seat;<br />
6. reposition the bracket “7” and lock the screw “9” again without tighten it completely, so that<br />
the sensor unit can rotate;<br />
7. rotate the sensor unit a few degrees at a time, until you obtain the outputs requested in the<br />
paragraphs immediately below;<br />
8. tighten the screw “9” by blocking the sensor unit with an open-end spanner so as to<br />
maintain the calibration carried out.<br />
12.1.3 Sensor S1 adjustment<br />
After replacing the sensor unit as described in section 12.1.2 , adjust it as follows:<br />
1. do not tighten the sensor completely until an accurate adjustment has been performed;<br />
2. attach the tool holder cone and ensure that the output of S1 is “ON”; if the output is “OFF”,<br />
rotate the sensor unit until it becomes “ON”;<br />
3. the sensor “4” is eccentric in relation to the bush “3” that contains it: rotate the bush slowly<br />
in the direction that takes the sensor away from the tool holder;<br />
stop immediately when the output of the sensor becomes ”OFF”;<br />
4. carefully rotate the bush back by about 15° - 20°, so that the output of the sensor returns to<br />
“ON”;<br />
5. rotate the shaft manually, and check that the signal remains “ON” for the whole rotation;<br />
6. tighten fixing screw “9”;<br />
7. release the tool holder by powering the piston at the pressure indicated in the section 8.1<br />
and check that in this condition (collet open) the output of S1 is “OFF”;<br />
8. release the pressure at the piston and allow the collet to close without tool holder: in this<br />
condition, the output of S1 must be “OFF” for the whole rotation of the shaft;<br />
9. if points (7) and (8) are not satisfied repeat the procedure from the start, making an even<br />
slighter rotation movement at point (4);;<br />
10. if points (7) and (8) are satisfied, make a cycle of 10 tool changes;<br />
11. at the end of the cycle, check that the conditions in the following table are satisfied:<br />
CONDIZIONE OUTPUT S1<br />
tool holder locked ON (*)<br />
missing tool holder<br />
with closed collet<br />
collet open<br />
(tool holder ejected) OFF<br />
OFF (*)<br />
(*) for the whole rotation of the shaft<br />
12. if the conditions of the table are not satisfied, repeat the procedure from the beginning;<br />
13. if the conditions of the table are satisfied, perform a cycle of 100 tool changes with the<br />
machine, using the maximum possible number of different tool holders.;<br />
14. At the end of the cycle, check that the conditions in the table under point (11) are satisfied:<br />
if this is the case, the regulation procedure for S1 is complete; if this is not the case,<br />
repeat the procedure from the beginning.<br />
5801H0066 en Rev.01 39/48