by Stone & Sannini - EKA Group
by Stone & Sannini - EKA Group
by Stone & Sannini - EKA Group

You also want an ePaper? Increase the reach of your titles
YUMPU automatically turns print PDFs into web optimized ePapers that Google loves.
layers in order to achieve stable and dense<br />
compacting.<br />
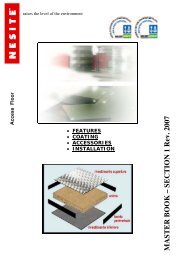
Laying the terracotta elements<br />
As a rule, the tiling elements should be laid<br />
and then thwacked with a rubber hammer,<br />
being careful to leave open joints of about 2-4<br />
millimeters between the various elements.<br />
Completing the joints<br />
The joints are then sealed using clean fine<br />
sand (with a maximum particle size of 2mm)<br />
until they have been fully compacted.This<br />
operation is performed <strong>by</strong> spreading the<br />
sand over the terracotta elements, making<br />
it penetrate into the joints with a broom in<br />
order to seal them. After the flooring has<br />
been completed, this operation must be<br />
repeated several times, a few weeks apart.<br />
These joints prevent any movement between<br />
the terracotta elements while also ensuring<br />
adequate waterproofing against surface<br />
water. When working with flooring that has a<br />
considerable slope (more than 15%), you can<br />
use dry cement (5% <strong>by</strong> volume) mixed with<br />
the sand in order to improve consolidation and<br />
evenness in the grouting material. At the end<br />
of the joint-sealing phase, the flooring must<br />
be compacted. This operation is done using a<br />
machine fitted with a steel vibrating plate (with<br />
a rubber bumper underneath), going over<br />
the flooring surface at least two times. The<br />
products that are part of <strong>Sannini</strong>’s “Externa” line<br />
for outdoor flooring, which feature chamfered<br />
edges, offer excellent highly-resistant corners<br />
to prevent any kind of damage to them caused<br />
<strong>by</strong> the vibrating action of the compacting<br />
machine. The last phase involves wetting<br />
down the flooring <strong>by</strong> sprinkling water over<br />
it (sprinkling the water acts as a precaution<br />
against “washing” the sand out of the joints) in<br />
order to consolidate the floor as a whole.<br />
For flooring that entails more demanding<br />
conditions of use as far as working load is<br />
concerned, it is essential to make a screed<br />
that is thick enough for the planned working<br />
load. The screed is placed between the<br />
ground and the sand so the sand will abut<br />
with an already consolidated bed. For terracotta<br />
flooring that is to be placed directly on<br />
natural ground, suitable “finished flooring”<br />
arrangements must obviously be prepared<br />
with effective drainage devices. The sub-floor<br />
in contact with the ground must be made with<br />
large stones, completing the upper layers<br />
with finer aggregates that will also help<br />
achieve the design slope of the floor field.<br />
In order to prevent the sand being used for<br />
the laying bed from gradually being washed<br />
away <strong>by</strong> rainwater and thus creating cavities<br />
(potentially causing buckling of the laid floor),<br />
a geo-fabric underlay can be placed between<br />
the sub-floor and the sand bed. Herringbone<br />
textures (and in general, all patterns with<br />
crisscrossed grouting) are particularly effective<br />
for dry laying, since separating the joints<br />
into compartments affords better protection of<br />
the sand compacted into the joints. With this<br />
laying technique, it is extremely effective to<br />
plan adequate lateral edging, which helps resist<br />
against the pressure produced <strong>by</strong> the flooring<br />
when it is loaded. To achieve this function,<br />
concrete rolls can be set up in the subfloor,<br />
changing the laying orientation of the<br />
terracotta elements on the surface <strong>by</strong> means of<br />
a different floor texture pattern.<br />
der Oberfläche durchgeführt und mindestens<br />
zweimal wiederholt. Die Produkte der Linie<br />
Externa für Pflasterungen in Außenbereichen<br />
von der Firma <strong>Sannini</strong> bieten mit ihren<br />
angephasten Rändern widerstandsfähige und<br />
optimale Winkel, so daß die Vibration der<br />
Rüttelplatte zu keinen Schäden führt.<br />
Zuletzt wird der Belag durch einen Sprühnebel<br />
(der Sprühnebel kann die Fugen nicht<br />
auswaschen) befeuchtet, um eine stabile<br />
Verbindung herzustellen. Bei sehr stark<br />
belasteten Pflasterungen muß zwischen<br />
Kiesbett und Sand ein Estrich hergestellt<br />
werden, der in seiner Stärke der Belastung<br />
entspricht, und so eingebracht wird, daß er<br />
sich optimal an das Kiesbett anlegt und somit<br />
Setzungen verhindert werden.<br />
Bei Cottobelägen, die direkt auf einem<br />
natürlichen Untergrund verlegt werden<br />
sollen, müssen selbstverständlich wirksame<br />
Dränagevorrichtungen geschaffen werden.<br />
Die Dränage wird mit großen Kieseln<br />
und in den oberen Schichten mit feineren<br />
Gemischen ausgeführt, die auch dazu<br />
geeignet sind, ein ebenes Gefälle im<br />
Fußbodenbereich zu schaffen.<br />
Um zu vermeiden, daß der für das Verlegebett<br />
verwendete Sand mit der Zeit durch das<br />
Regenwasser ausgewaschen wird und<br />
somit Hohlräume entstehen (und folglich<br />
mögliche Senkungen des Belages) können<br />
Betumenbahnen benutzt und zwischen<br />
der Dränage und dem Sandbett angeordnet<br />
werden. Fischgrätentessierungen (und<br />
im allgemeinen alle Verlegungen mit<br />
entgegengesetztem Fugenverlauf) sind für die<br />
Trockenverlegung besonders geeignet, da<br />
sie durch die Unterteilung der Fugen einen<br />
besseren Schutz verleihen.<br />
Bei dieser Verlegetechnik ist es außerdem sehr<br />
nützlich, geeignete, seitliche Einfassungen<br />
durch Leistensteine vorzusehen, die dem vom<br />
belasteten Fußboden ausgehenden Druck<br />
entgegenwirken können. Zu diesem Zweck<br />
kann man in der Unterlage Bordsteine aus<br />
Zementkonglomerat anordnen und auf<br />
der Oberfläche durch ein andersartiges<br />
Design der Tessierung die Verlegungsrichtung<br />
der Cottoelemente ändern.<br />
dernière opération qui consiste à introduire<br />
le sable dans les joints avec un balai après<br />
avoir saupoudré les éléments de sable pour en<br />
effectuer le scellement, doit être recommencée<br />
à plusieurs reprises pendant des périodes<br />
successives jusqu’à la fin du carrelage, en<br />
laissant passer quelques semaines entre<br />
chaque intervention. Ces joints empêchent<br />
les mouvements entre les éléments en cotto<br />
en assurant en même temps une perméabilité<br />
adéquate aux eaux de surface. En présence<br />
de carrelage présentant des pentes<br />
importantes (plus de 15%), on peut utiliser<br />
du ciment sec (5% en volume) mélangé au<br />
sable pour obtenir une stabilisation et une<br />
homogénéité meilleures du matériau de<br />
jointoiement. A la fin des opérations de<br />
scellement des joints, le carrelage doit être<br />
compacté; cette opération s’effectue avec une<br />
machine équipée d’une plaque vibrante en<br />
acier (avec protection caoutchoutée<br />
sous-jacente) et en deux passages sur<br />
le carrelage. Les produits de la ligne Externa<br />
pour carrelages extérieurs <strong>Sannini</strong> avec<br />
traitement en biseau des bords offrent des<br />
angles résistants et idéaux pour ne pas subir<br />
de dommages au niveau des arêtes suite aux<br />
vibrations de la machine de compactage.<br />
Pour terminer, mouiller le carrelage avec<br />
un jet d’eau en pluie (en évitant ainsi de<br />
délaver le sable mis en place) pour solidariser<br />
l’ensemble. Pour les carrelages exigeant des<br />
conditions plus sévères du point de vue des<br />
charges supportées, il est indispensable de<br />
prévoir la réalisation d’une chape d’épaisseur<br />
adaptée à la charge prévue qui sera<br />
interposée entre le terrain et le sable de façon<br />
à ce que ce dernier se mette en place sur un<br />
support déjà consolidé. Pour les carrelages<br />
en cotto que l’on désire poser directement<br />
sur un terrain naturel, on prévoira bien sûr<br />
des solutions de pose adaptées avec des<br />
dispositifs de drainage efficaces. La couche<br />
de fond en contact avec le terrain doit être<br />
réalisée avec de gros blocs sur lesquels on<br />
posera des agrégats plus petits qui seront<br />
utiles pour obtenir les pentes prévues. Pour<br />
empêcher que le sable utilisé pour réaliser<br />
le lit de pose puisse être, dans le temps,<br />
dispersé par l’eau de pluie en créant<br />
des cavités (et des glissements possibles<br />
du carrelage), on peut utiliser des toiles<br />
géotextiles entre la couche de fond et le lit<br />
de sable. Les textures en écailles de poisson<br />
(et en général tous les joints en quinconce)<br />
sont particulièrement indiqués pour la pose à<br />
sec car la segmentation des joints offre une<br />
protection efficace du sable compacté.<br />
En adoptant cette technique de pose, il est<br />
utile de prévoir des bords latéraux pour<br />
compenser les pressions produites par le<br />
carrelage quand celui-ci subit des charges.<br />
Pour ce faire, on peut disposer dans la couche<br />
de fond des cordons en conglomérat de<br />
ciment et, en surface, un changement de sens<br />
de pose des éléments en cotto en modifiant la<br />
texture du carrelage.<br />
texture<br />
introduzione di Alfonso Acocella<br />
grafica Giuliano Ciocchetti<br />
introduction <strong>by</strong> Alfonso Acocella<br />
design <strong>by</strong> Giuliano Ciocchetti<br />
263